Featured Products
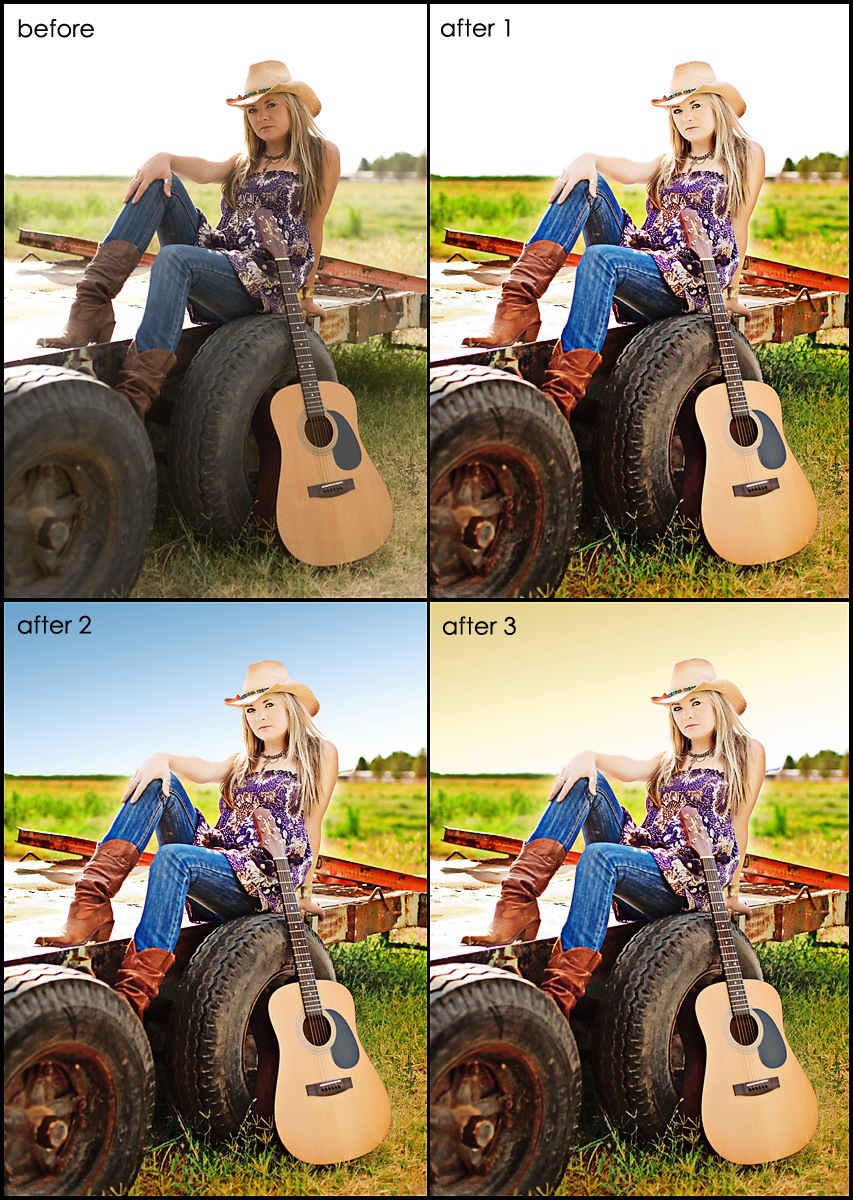
I just had to play. Check out yesterday’s post for detailed step by step of how Sandi Bradshaw edited this photo.
Here are my plays.
MCP All in the Details: flashlight action – changed opacity to 100%
MCP All in the Details: extreme color action – used the extreme color painting on grass and tractor. Used detail layer at 46%. Masked back skin and guitar at 100%.
MCP All in the Details: hide and seek action – Used “hide” on the background and seek on the skin
MCP Magic Skin: Magic Skin at 42% and Skin cast blast – bye bye mellow yellow and a second color correction curve
MCP Eye Doctor
After 1, 2 and 3 all are the same except that for 2 and 3 I added sky at the end. I used the magic wand to select the sky. Then I added a new blank layer and used the gradient tool and made the sky. I added a mask to clean up any areas that needed it. I did this with a blue gradient in after 2. Then on the sky layer I added a hue/saturation adjustment layer and clipped it to the sky. I played with the hue until I ended up with after 3.
After looking this over, my critique is that I went too far with the sky. I wish I lowered the opacity of the sky more so it was less obvious. But it may just look obvious because I am looking at it next to the blown out sky. Hmmm. I also wish that her face did not look so flat. As I fixed exposure it lost detail. And I could have tried going a little darker to retain detail.
I decided to do one more play. Normally I love Color. But this Pastel Looking play – well – I just liked it better.
For this one I used:
MCP All in the Details: flashlight and put opacity to 100%
MCP All in the Details: pastels – default – then masked off skin on detail layer
MCP All in the Details: dusty 35%
MCP Touch of light on the face and skin
MCP All in the Details: in stark contrast action at the default opacity
Then I resized for web and added a frame and border. As always I would love to know what you think…
No Comments
Leave a Comment
You must be logged in to post a comment.


wow love it! I really need to buy your actions!
Rockin’!!! Once again, your talent never ceases to amaze me! 😉
Beautiful! Nice crop…really changed the feel of the photo. Those eyes are GORGEOUS!!!
Great work! Ok, you sold me!!
wow! she is a senior??!!totally gorgeous!wonderful work…tfs 😀
I love your Magic Skin actions and use them all the time. They have made such an improvement to my photos! 🙂
This is awesome! Thank you so much for always sharing your info!
gorgeous girl!! You got a beautiful capture there 🙂 Thanks for the tips!!
I LOVE your Eye doctor and Magic Skin actions (my favorite is Magic Powder) and i use them all the time…i highly recommend them!!
I’ve used your actions on almost every senior I’ve done this year, thanks for making me look good!!