Featured Products
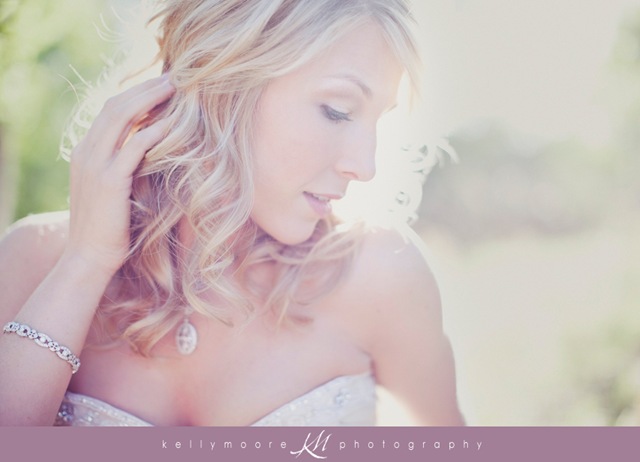
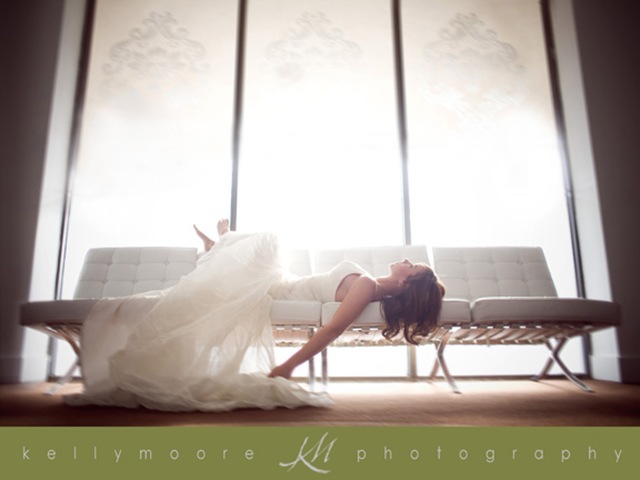
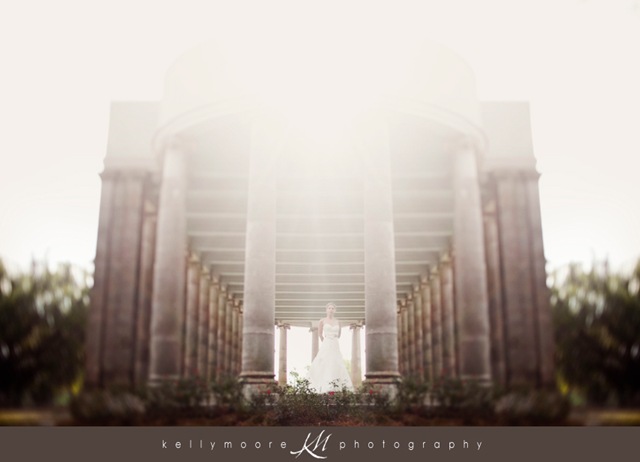
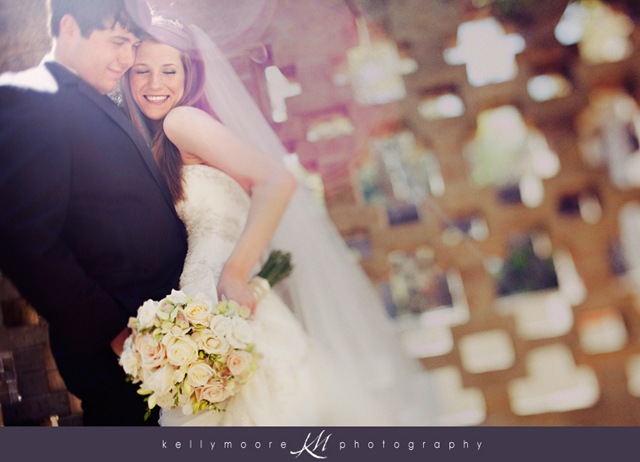
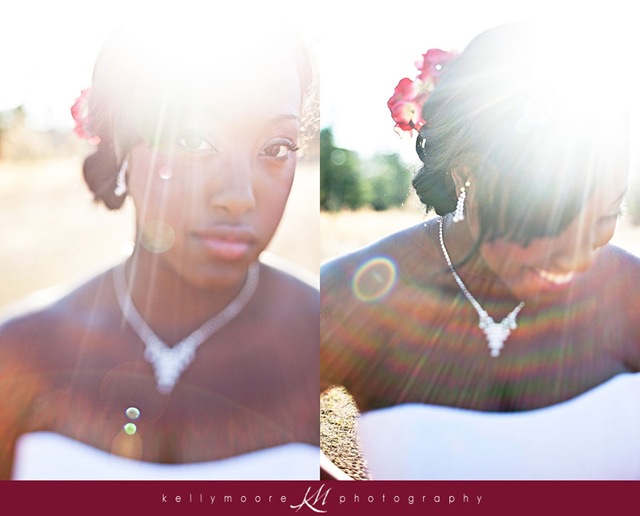
Shooting Into the sun….flare baby!
I believe that every little trick you have up your sleeve as a photographer can give you an advantage in your market. Do you feel like sometimes all your work starts to look the same?
You know…vertical…….even tones…..smiles………50mm….you get the point! Shooting into the sun is not rocket science, and neither is flare, BUT it is one more tool that you can add to your bag of tricks to offer a different perspective to your photo shoots. (Hopefully I can do a post one day about perspective… because I love to talk about it ;), but for now, I’ll just stick with the sun.)
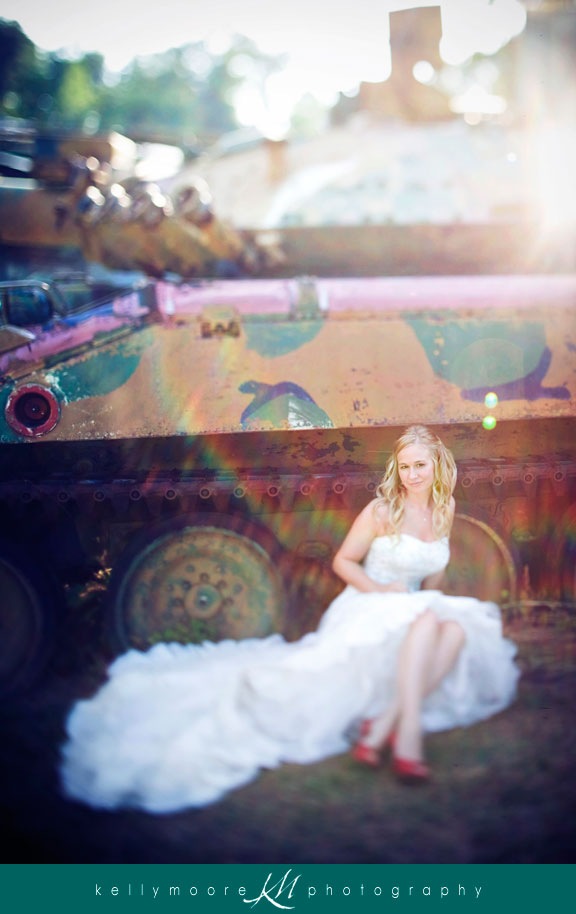
It’s so important to constantly change things up, give your viewers and your clients something new to look at and hopefully something unexpected. Flare is technically something that is incorrect. The people who make our lenses do everything they can to prevent us from getting flare! What do you think those horrid lens hoods are for?? (And, no, I do not use them…I always say, they are for men who want to make their lenses look bigger☺) When used correctly, flare can be a beautiful thing that adds romance and mystery to your images! Flare is also a great technique when you are in situations where the scenery isn’t ideal. The sign of a great photographer is being able to take a terribly ugly place and transform it into something magical just by using creative lighting.
Below are 5 killer tips that will hopefully help you to master flare and shooting into the sun.
1. Exposure: The number one question I get when talking to people about this technique is how to correctly expose for your subject. It is really important that you shoot in Manual mode to achieve this look. Many people say they shoot manual, but actually don’t. If you are using manual, but you are still determining your iso, shutter speed & aperture by the meter in your camera….you are still letting your camera tell you what to do! You’re camera’s meter is great, but not always correct, especially in a backlit situation. When you are pointed into the sun, you’re camera thinks you are overexposing, so if you set your settings by your meter, you’re subject will be grossly underexposed. In this situation, ignore your meter and just go by you display and histogram. I always expose for my subjects skin. To achieve creamy, beautiful skin, I am just a stop or 2 below overexposing their skin. Make sure that you are using your camera’s highlight indicator. I just make sure that my subjects face is not blinking. In a backlit situation, it is ok for your background to be completely overexposed. This is actually what gives you the dreamy look you are going for.
2. Focusing: Focusing when you are shooting directly into the sun is close to impossible! Again, you are asking your camera to do something that it’s not meant to do. I go ghetto…I use my hand to help me focus. I always center focus, so I will put the red focus area on my subject, then I use my hand to cover as much of the sun coming into my lens as possible. This should get rid of the flare for a second. Once I’ve locked my focus, I remove my hand, recompose, and shoot! Works every time…well not really….Another trick is to use a higher aperture in these situations than you normally would. This allows you some wiggle room if you’re focus isn’t dead on.
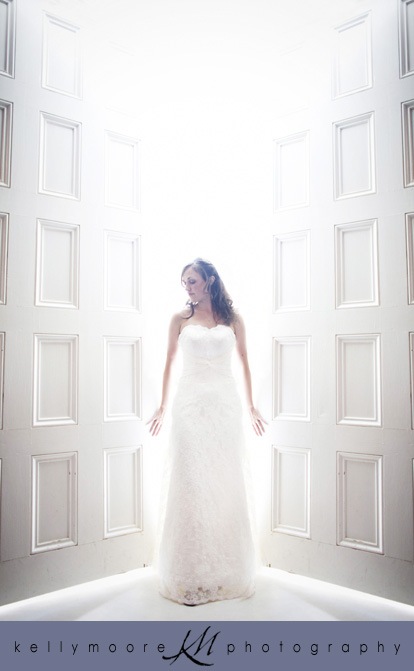
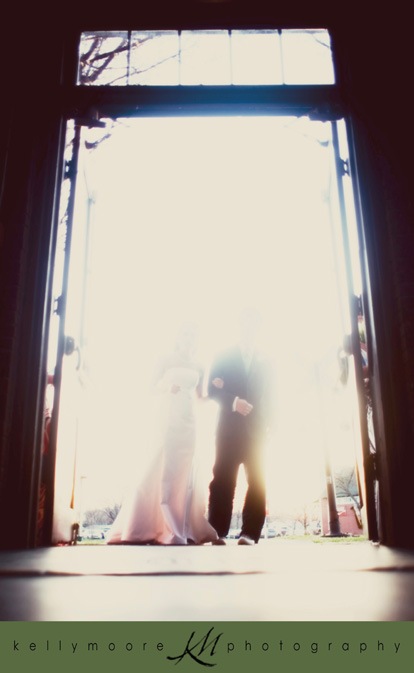
3. Time of day: When I first started experimenting with this technique, I pretty much ended up mad a lot. I, for the life of me, couldn’t figure out how to get that blasted sun behind my subjects….duh. I finally realized that for me, I get the best flare when it’s later in the day. If you wait until an hour or so before the sun goes down, you don’t have to lay on the ground to get the sun behind your subjects. I’ve said this before, but the sun seems to have a softness about it as it moves down on the horizon. Of course, I don’t always follow this rule. I will lay on the ground at 3:00 to get the sun behind my subject if need be. One more thing: remember that you don’t necessarily have to be outside to use this technique. You can be inside and have a person’s back to a window or door. I’ll give you several examples below.
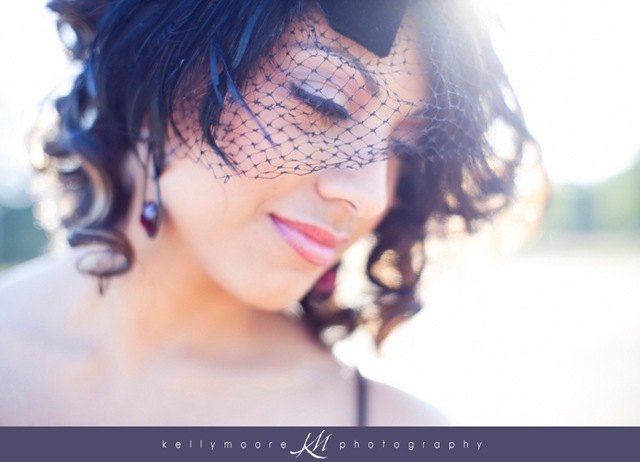
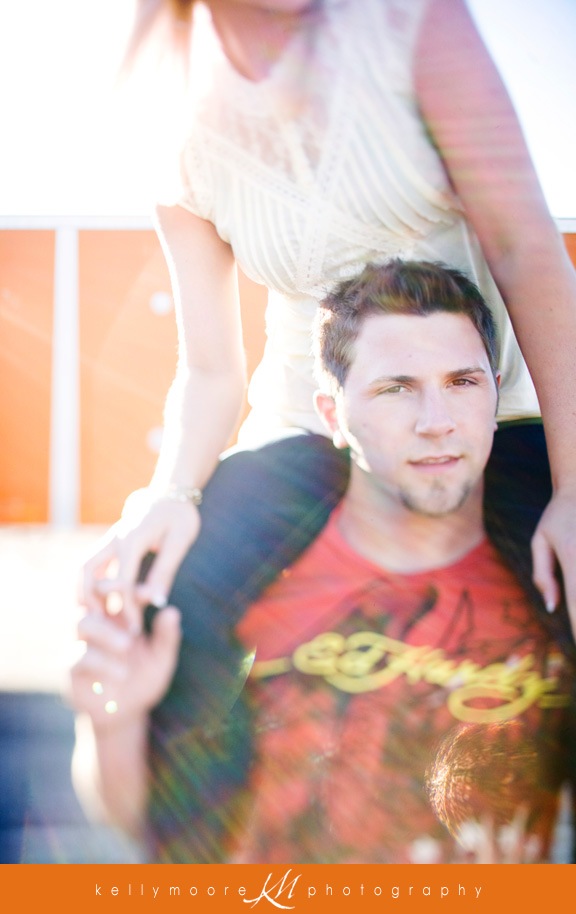
4. It doesn’t have to be perfect: Remember that the fun of this technique is not knowing what will happen. As you can see in some of my sample images below, it’s not always necessary to see a person’s whole face. Don’t analyze this too much! If it makes you feel warm and fuzzy inside, go with it. When you shoot into the sun, and get crazy flare, your image might not be perfectly sharp….who cares. Again, this is about creating something fun, and pushing yourself into unknown places. Don’t get caught up in wondering what your clients mother might say if she can’t see her son’s whole left eye! Relax, you gave the 567 perfectly exposed smiling images. Being a photographer is not only about pleasing your clients, it’s about shooting for yourself.
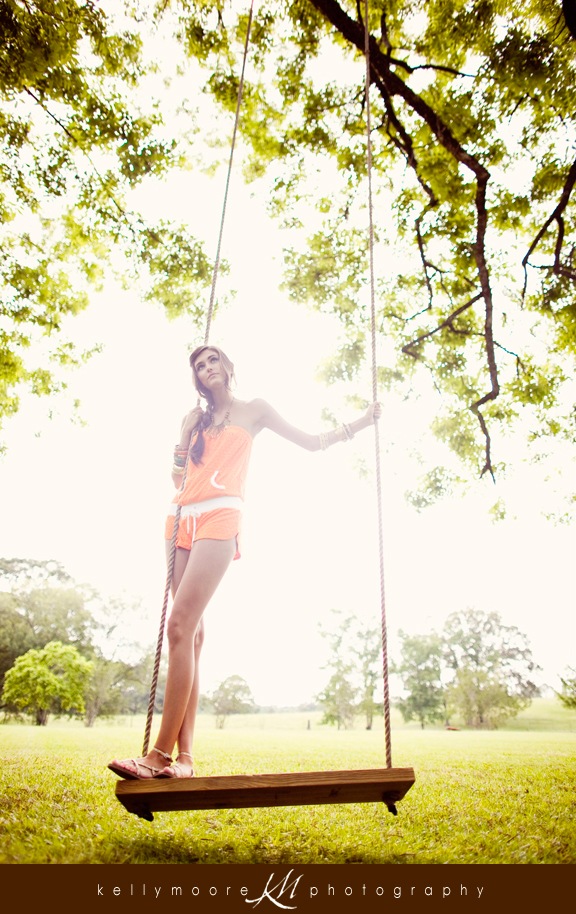
5. Different lenses, different flare: Keep in mind that different lenses produce different results. I’m not an expert on this, but It seems that the nicer the lens, the harder it is to get good flare. I’ve also found it almost impossible to get it from my canon 85mm 1.2. I usually stick to my canon 24mm 1.4, and my canon 50mm 1.2….and if you really want some sweet crazy results, throw on a tilt shift! I’ve been able to get a really neat rainbow effect.
Thank you to Kelly Moore Clark of Kelly Moore Photography for this amazing guest post on Shooting in Sun and Flare. If you have questions for Kelly, please post them in the comment section on my blog (not Facebook) so she will see them and can answer them.
No Comments
Leave a Comment
You must be logged in to post a comment.





Stunning photos!! Thanks for the tips! Can’t wait to give it a shot 🙂
I think it is so RAD in the Photography community that people are so willing to share their tips, thanks for your abundant knowledge, you ROCK at what you do!!!
Wow, this was exactly what I’ve been looking for! I have a couple questions though. First how do you get that wonderful star shape from the sun? All I ever get is is a blown out sky! And second, I get a weird green flare on my pictures when I’d like the nice warm yellow, does thisw depend on the lens? Thanks!
Shoot at a smaller aperture like f11
Kelly..that 3rd pic down is one I’ve never seen. Amazing shot!!!! Your just stupid good. Period. I’m signing off!!
Shannon ~ you can get the star shape from the sun by stopping way down to f/14 and higher. The same effect works with long exposures at night to turn street lights and other light sources into stars. The number of points in your star will be determined by the number of blades in the lens, so each lens will have a slightly different result.
I have used some of these techniques before, but have a problem w/ a weird purple color that lines my subject when it’s overexposed behind them. I’ve read that my camera sometimes will cause this (I have the 5dMarkII). Any suggestions as to how to fix this?
Wow, thankyou so much for these tipS! So selfless and wonderful of you guys to help us photographers here. Much appreciated!
I agree! Very nice of them and I’m excited to get out there and try out these tips!!
congrats! gorgeous work!
gorgeous!
What a creative post for the day. I love trying things that are different once in awhile to keep things fresh and fun. Thanks for all your tips and pix.
Love this advice … I’ve been practicing and this gave a ton of great advice!
Kelley you’re awesome! Such a great post! I totally agree with tiltshift flare! i love it!!
Love these images! TFS
Great tips and beautiful images!
These images are breathtaking!! Thanks so much for sharing your knowledge. A couple of times, I “accidentally” produced sun flare in my images and now I’m completely hooked! I have a dumb question though… what exactly do you mean by throwing on a tilt shift??
GORGEOUS images! Wonderful info too.
Thanks so much for the tips Kelly! Gorgeous photos all around. Now I’m all inspired! 🙂
Hey Guys!Thanks again for having me here! I’m really enjoying being able to put my thoughts on paper…or blog:)Toki-I meant, I used a tilt shift lens to get that type of flare.Thanks!
I love Kelly’s blog, I’ve been following it for months… and this article was absolutely fascinating for me. Definitely going to try it out this weekend.
Kelly your work is so beautiful.I love to play around with sun flare but I have trouble when I come to editing. I seem to loose my flare or something else.How do you edit a sun flared photo?Keep up the fantastic work.
Beautiful, gorgeous photography. Very inspiring post as well. Thank you so much Jodi and Kelly. :0)
Absolutely amazing work. Some of the best “sun challenged” pics I have ever seen. Really appreciate your tips and showing off this work.
Kelly – GREAT tips – I loved them and can’t wait to try them. I’ve worked so hard to prevent flare in the past, I’ve never considered it’s artistic appeal. I’ve been missing so much!! I do have a question. Do you treat your flare pictures any different in post processing? Do you remove some of the saturation or is that happening naturally from the flare? All of your photos has such a mystical appeal to them and I’m curious how much (if any) of that is coming from post. THANKS!
super cool stuff~!
NEW WEBSITE TOMORROW!anyways.. kellys you are awesome! and we shoot alike! i go ghetto too! its perfect! be well!
great article kelly. flare is fun.
Thank you so much sharing your talent and beautiful images. I would love to see some before and after, just to see if I am on the right track.Thanks!
Hey Guys! Hopefully I can answer your questions below:Sara-I do most of my editing in Adobe Camera Raw. When I’m dealing with all that flare, I usually up my contrast and my blacks quite a bit. Other than that, if you captured it in camera, you shouldn’t loose it in editing. Hope this helps.Patrick-Like I said above, most of what I do is in camera and in ACR, so I don’t do a ton of post production. I do treat them differently than a normal image however, b/c they usually don’t have much contrast or sharpness to them. Like I said above, I just turn up the blacks, contrast and sharpness quite a bit.Kyla-I’ll see what I can do about getting you some before and afters!Katy-I don’t think I’ve noticed the purple lining. Do you have a link to an image I can take a look at. I’m guessing you are probably over thinking it. I get all sorts of weird color when I do this, but if the image moves me, I go with it.
Kelly, stunning images, particularly the tilt/shift one – what a corker! Katy, the “purple fringing” you’re seeing is most likely chromatic aberration – often visible on edges of very high contrast, especially with cheaper lenses. Easy fixes in PS include the Lens Correction filter, and selective colour channel desaturation of the affected edges. Stopping down the aperture might help reduce it.
Here is the before and after you requested!http://kellymoorephotography.com/mooreblog/?p=5293
Love these tips! Thank you!
Thank you both so very much for sharing! You have inspired me once again to go beyond my comfort zone….can’t wait for sun!
thanks for showing us such awesome pics! I’ve been shooting with the sun behind my clients for a bit now. Clients love them…but I tend to feel as if they are missing something. thanks for the exposure note…that will most certainly help!! P.
Great tips, I’ve actually found that doubling up on my protective filters intensify sun flares.
Great tips! I’ve been trying to apply this effect by trial and error, I am hoping all this info will help! BtW, STUNNING captures!! :))
Best Advice ever!! “I always center focus, so I will put the red focus area on my subject, then I use my hand to cover as much of the sun coming into my lens as possible. This should get rid of the flare for a second. Once I’ve locked my focus, I remove my hand, recompose, and shoot” Thank you!
Thank this was very helpful!
Great!
Great post, very useful tips.I could add that when dealing with flare, setting a wide aperture (f/2.8, f/3.5 etc) can sometimes create an unpleasant wash-out effect. You could reduce the aperture size to f/22 or lower if you can. The sun will now look like a star!See some of my examples in my blog post: http://www.alexandruvita.com/blog/2010/08/19/shooting-into-the-sun/
Hi, great post! Any suggestions on getting lens flare while working with fill flash or strobes? Would it even work?
I have always wondered how to shoot directly into the sun. I can’t wait to go practice this now. Thanks so much Kelly. I am so excited to try something new!
WOW. I love the pictures and what great information you’ve given.
One of my favorite techniques, I use the cheapest lens I own to get the best results. This was shot with Nikon 50mm 1.8f
Thanks for sharing this article. Great tips! I’ll be sure to post it to my site http://catherinefinnphotography.com/blog/
Brilliant. Not tried it yet but want to be ready when the time comes. Just what I needed
I love shooting portraits against the sun. I get fantastic hair light and hallow around the head. Near the camera I fire a strong flash to fill in. Your tips are really great. For Brides i have some information at http://www.sussex-weddingphotography.com/guidebook-for-brides/
Great explaination of this technique. I have 2 more weddings to shhot this weekend so fingers crossed I’ll get some sun and tomorrows an all day shoot so hopeful for some sun when its a bit lower.
ok. maybe i’m stupid but what settings?? I have struggled with silhouettes and sun pictures forever! Should the ISO be high or low, aperture is wide, slow shutter speed too? WHAT? I’m the type that tries to figure it out at every shoot and forget to remember what I did to get it right! Help!
this is exactly what i needed to read about this technique ,,thank you so much,,loved it
Thank you for the note about the 85 f1.2. I was so excited to use it for my first sunset shoot, but I can’t for the life of me get flare with it like I can with my 50. I love, love, love the flare I get with the 50mm. Great post!
This post is the perfect example of a nice and informative post… I really like the the pictures too…
Beautiful examples and great explanations! Thanks!
Great photos. Very inspiring
I do this one a lot. It hurts my retinas but its worth the shot.
So wonderful and I love that you posted this on Pinterest!
I’ve always been so frustrated with soft focus when shooting into the sun. I’m wondering why this trick would work: “use a higher aperture in these situations than you normally would.”Thank you so much for sharing your tips!!
Great Post! I love flare, but it is always good to hear how someone else does it. Thank You!
Looking at some of these images makes me completely jealous. Hopefully, I can apply some of these techniques to improve my technique of shooting into the sun.
great tips. only part is disagree is ur opinion that lens hood r for guys to make their lens to look bigger. shooting for years, my lens hood have saved me thousands of dollar worth of repair. i agree some people use lens hood to make their lens look big. however, i suggest lens hood to be on in confined, crowded or places that u can bump ur lens into easily.
It’s really fantastic when you can follow a bunch a of links that actually take you somewhere useful. I loved the article on flare and the photography. Keep up the good work, seriously.steven
Many thanks for the great tips and series of images!! Happy Xmas 2011
I love this blog, Jodi … and Kelly Moore is an amazing artist !
Thanks for posting her tips! Found it on pinterest and repinned 🙂
Wow.. Thanks so much for this tips?This is an area in my photography that I want to tap into.Will use your technique to perfect mine.Thank you
Nice tips, thanks. Wondering if the same effect can be done with Photoshop though?
Wonderful article on shooting onto the sun! I found this article pinned on Pinterest, love your “ghetto” technique!
You are so awesome! I am so happy I found your site. Love everything you had to say!!
Been shooting into and out of the sun for years. I have 3 daze free, anyone out there and ready to shoot in or out of the sun……..Were ready….:)
Standing by?????
Thanks so much for this post! I try to mix it up now and then, and this sounds like a great effect to try. I occaaionally get flare accidentally, but I’m now inspired to get some intentional flair! 🙂
Awesome! Thank you!!
I love shooting into the sun. Here are my examples cc welcome 🙂 http://lauraruizphotographyseniors.com/2012/03/19/light-and-more-light/
This is so helpful!! Thank you thank you! I love shooting into the sun and playing with flare but definitely need to hear some tips on this style! Thanks again for sharing this!!
hello, i am planning to capture venus transit on 6th of june, 2012. its around 3 hours of video capture that i am talking about. i have a sony nex-vg20. what do you suggest i do to cut down the heat and what filters do you suggest ?? direct expose of this cam would fry it!
Jenny sun is an Australian photographer and she gets these amazing circular rainbow flares that I cannot figure out. She says they are done in camera. Check her out. Maybe a lens filter…..?
Amazing tips! Will use them next time when doing a photo shoot!
the one i learned…:)
I am learning so much from you tips and your Blog. I like the sun flare/backlight photos a lot, but I’m not quite sure I’m doing them right. I am attaching a picture of one I took, please let me know if I have the right concept, and how can I improve.ThanksTchrina Munlin
A great article, with some amazing tips.Will have to check out a few more of your posts.
Great photos. I can’t wait to try this out on friday.
I am not sure what you meant by tilt and shift, I very new to manual mode and am so excited that you shared this!
Kelly-Love this article and your work. When you say you always use the center focus point, are you saying you place the red center point over the client’s eye (or whatever you want in focus, then lock focus and recompose? I’m assuming you mean you’re using back-button focus?? I feel like ever since I have started using back-button focus, it has drastically changed my composition/perspective and have become slave to getting a certain focus point over the subject’s eye. If I understand you correctly, it’s possible to lock the focus of the center point (or any point?) and then recompose? That would help me get back to my own ideas for composition. Thanks!Mary
This is fantastic post with some beautiful images. I think I’ve just found my “go-to” photography blog site.
Sweet stuff Kelly! Thank you for sharing. By the way. Some lens hoods (for more expensive lenses) are made for protecting the lenses from hitting the accidental corner or so. But, yes i like the idea of taking the hood off to accomplish the goal of flare. Thank you.
Great tutorial.I’ve been trying to get people’s answers on this, but (as a newbie) I’d like to know – do you look through the lens when you take these or use Live View? Some people say not to look through the lens as you might damage your eye looking at the Sun and others say not to use Live View because your sensor is exposed for longer and you might damage it.Which do people do?
Last year my sister took this picture with her older small camera. How was the trumpet shaped image formed by sun glare? This picture has us all confused it also has many faces within it.
The photos that accompany the article won’t load any more 🙁
Thanks for the article! It has some really good information that I am excited to use in my next shoot.
I love your style! Great info.
I had the chance to attend the give me Moore workshop 5 or 6 years ago, best hands on workshop that I have attended. I now am able to shoot images like the one attached easily. I enjoyed learning from her, and her work is outstanding! When I grow up I want to be like Kelly. 🙂