Featured Products
Photoshop Tutorial: How to remove glare on glasses in Photoshop – the Take Two Method
To expand on yesterday’s post on removing or eliminating glasses glare, I will be showing you the “take 2” method.
This method involves taking multiple shots of the subject with and without his or her glasses on. While photographing take images both with the subject’s glasses on and off for each image you hope to use where you do see and cannot avoid glare with other methods.
Once in Photoshop, you will pick two shots to use – one where you like the image and the subject has glasses on. This will be your main base image. Then select a photo where you like the eyes. The close you are to similar position, orientation, and size, the easier this will be. You will be taking the eyes of the non glasses wearing image and putting them into the glared glasses.
Here are the two images we will use today (thank you to Crane Photography for providing these images).

As you can see the photos are similar – but the angle slightly different. The sizing is very close so this should be relatively easy to do. The 1st step is to select the eyes with the marquee tool in the photo without glasses (shown in red here).
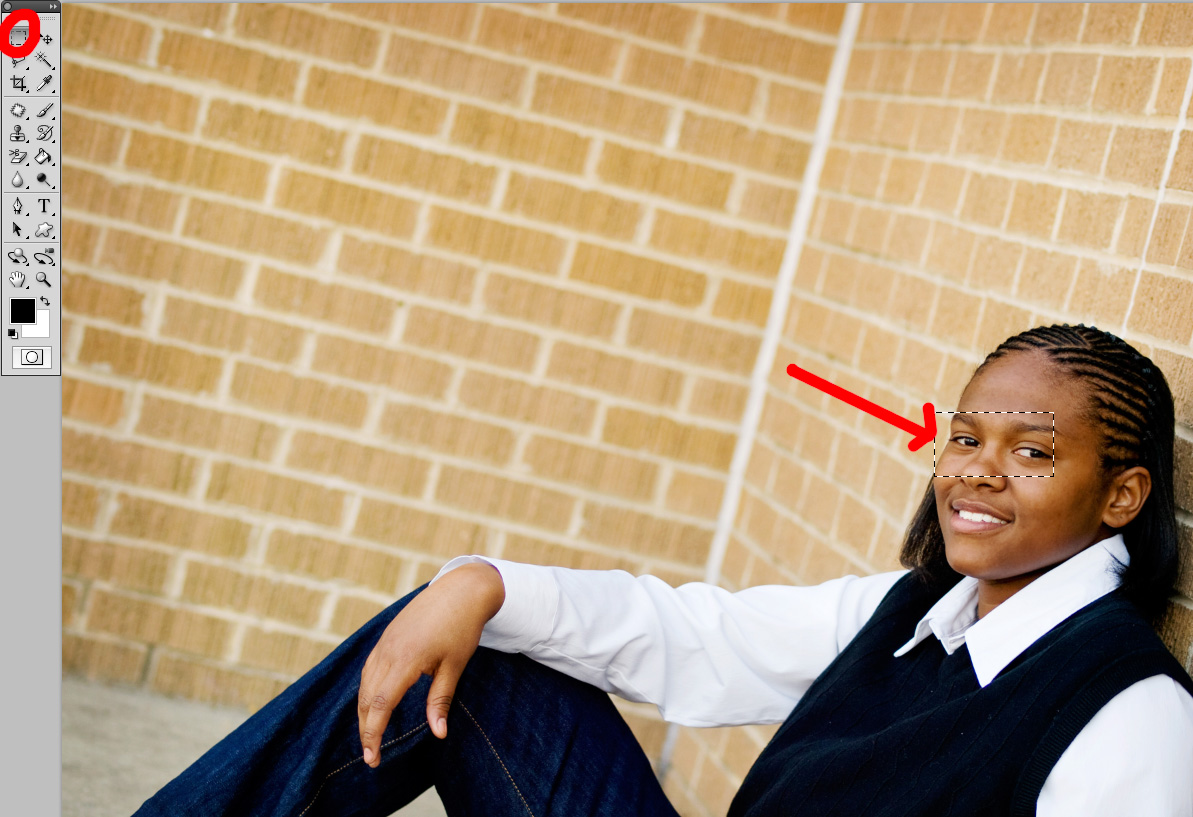
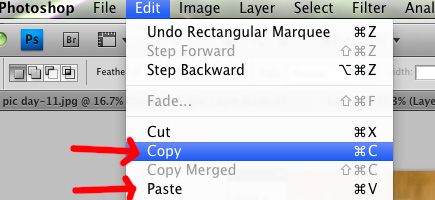
Then go under EDIT – COPY. Go to your “base image” and go EDIT PASTE.
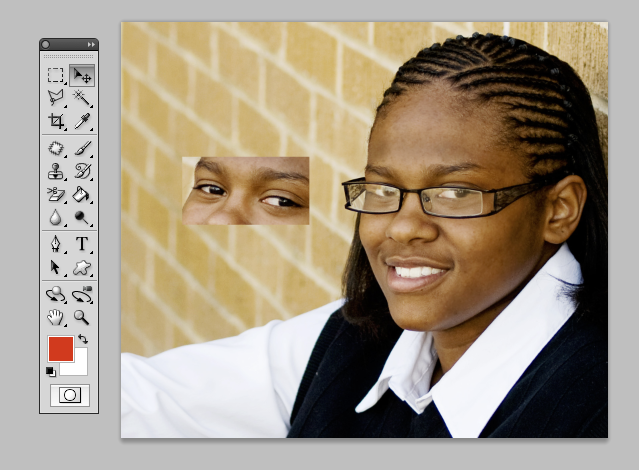
This will be the result once pasted into this “base” photo. You will use the move tool to position the eyes as close to the eyes in the glasses.
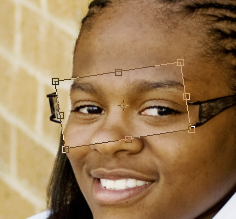
You will use the TRANFORM command next (by using CTRL + T for PC or Command + T for Mac). This will bring up handles as shown here. You can rotate the image and resize the image so it best fits over the eyes in the glasses. If you are having trouble, slightly lower the opacity of this layer temporarily so you can see through to the “base” image – remember to put it back to 100% when done with this step.
Click the check mark in the top toolbar to accept the change. Then your image will look like this:

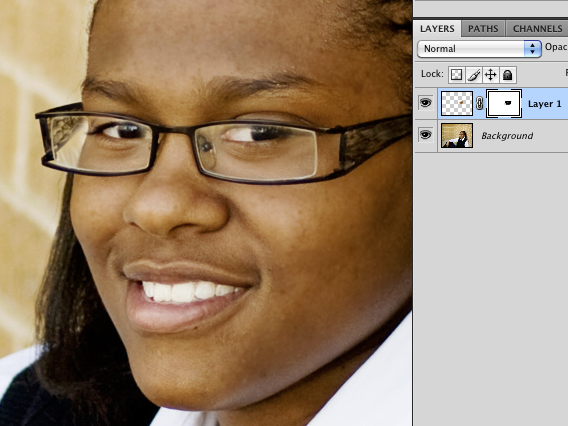
Next we need to blend the eyes in. To do this we use a layer mask. Click the button shown in the layers palette to add a layer mask.
You will use black to hide the edges of the skin. Remember white reveals (shows), black conceals (hides). If you are unfamiliar with masking, you may want to watch my layer masking video here. As you paint with black to hide the top layer in parts, it will reveal the glasses. Make sure not to paint black on the eyes or the glare underneath will show again. If you paint too much, switch to white as your foreground color and paint back. Go back and forth. Here is a closeup of the photo shown with the layer mask.
And here is the final image. Please leave a comment if you learned something, have a question, or if you found this helpful.

No Comments
Leave a Comment
You must be logged in to post a comment.


WOW, that’s awesome. Can’t wait to try it out 🙂 Thanks so much.
This freakin’ rocks!!! I often will look for eyes in another image, but it would have never occurred to me to actually have them remove their glasses to have a perfect eye source! Thanks!
What a great tip–I’ll have to give this a shot with my own glasses!
I’ve so done this before! It rocks! One thing I have found though is that sometimes the eyes look too clear…they don’t have the fog of the glasses. I’ve painted over with a faint layer of white to fog the eyes to match the rest.
What a fantastic tutorial,recently i had a lovely photo of my daughter that i deleted,due to her eyes being closed,if only i had known this.Thankyou
I have done this before but usually try to keep the shot exactly the same. I love that you can use the transform tool like this … I would have never thought of it!Thanks Jodi!
I REALLY found this to be helpful!! Thanks a million!
Now this is a fantastic tip.
Awesome tip. Thanks.
great TUT! thank for share!————————————Photoshop Brushes | Brushes For Photoshop
Great info, thanks a lot.
Thanks so much for this great info!!! I tried it and it worked out so well. No more glasses glare for me!! 🙂 I also did a head swap too. The picture shows my results.
Thank you thank you thank you! My way of doing this was much less successful!
This is great news. I photograph the staff here at the office. Some wear glasses and I always have to deal with the glare. Now I actually know how. Thank you.
That’s so awesome, Jodi! Thanks for sharing this – it’s much better than my *previous* method. LOL!
Thank you!!!!!