Featured Products
I edited this photo using MCP Photoshop actions for I Heart Faces. This photo was submitted by Caroline of frog-photoblog.blogspot.com.
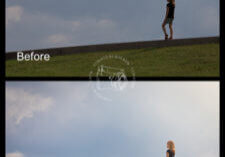
When shooting on a bright day with the sky behind the subject, if you do not have a flash or reflector, it is hard for your camera to balance the exposure properly. Your subject likely will be underexposed and background overexposed. To fix this you can use Photoshop actions and layer masks to control where you need light.
I worked on this photo exclusively in Photoshop CS4 using the MCP Actions Bag of Tricks Photoshop action set, alongside Magic Skin and the Eye Doctor. These 3 Photoshop action sets can be found together in the Incredible Retouching Package. Then I completed the photo for web display using Frame It from the Finish It actions.
Here were my steps:
- Used Bag of Tricks “Magic Fill Light” action – ran it 2x at 100% opacity (flattening in between)
- Ran Bag of Tricks “Magical Clarity” and left this at default of 27%
- Flattened so layer order would not present issues
- Used the Bag of Tricks “Sky is Bluer Illusion” action at the default settings
- Flattened and then duplicated the layer – ran “Gaussian Blur” to get rid of added color pixelization from making sky so vivid. Used setting of 8.8.
- Added a mask to the blurred layer and masked off the girl – so only sky was effected
- Flattened so layer order would not cause issues
- Used Bag of Tricks Magic Light (on face – painted using 30% brush)
- Used Bag of Tricks Magic Dark (painted on using 30% brush around edges of photo)
- Duplicated background and used patch tool on rash on elbows
- Ran Eye Doctor – used catchlight and Iris layer
- Ran Magic Skin at Default opacity
- Finished things off with Finish It actions – used Frame It Over-sized and sampled a blue from the sky to tie it all together for the web
This is before image:

And here is the after:

No Comments
Leave a Comment
You must be logged in to post a comment.














WOW! She did a wonderful job! I especially love the color version — the Green just grabs you and the skin tone looks lovely.The only suggestion I would make — can you smooth out the wrinkle/fold in the backdrop. It was a little distracting and kept bring my eye to it.Again – this is beautiful.PS — we’re praying for the Phillipines and the recent devestation!
Wow, what a difference. The original picture says nothing, but the edited version looks great.
I also find the wrinkles in the background distracting but the rest of the editing is nice. I think I prefer the color version for the pop of color in the letters. Because of all the white, this image is a little plain in black and white for me. It looks like your actions made a big difference.
Funny how I did not notice the wrinkles till you said so. 🙂 Now I see it and want them gone. Easy fix with cloning and the patch tool.
LOVE them both! Great shot and great job on the processing! I agree about the background. Gorgeous though!
I prefer the b&w version, it really makes a statement. Certainly need the wrinkles gone…the skin coloring in the edited version is beautiful though.
I really get a lot out of these blueprints. The last time you posted a blueprint, I pretty much followed the same edit workflow (using your actions) on a group of images that I needed to enhance…and they immediately started looking better! 🙂
Hi Jodi,Thies picture offers a very good possibility to show your new actions. Why havenŒÇt you used the white Background tool you were telling two or three posts ago? You could showto us how it works…NEVERTHELESS:I canŒÇt wait until MONDAY! I die!Best wisheskarin
Karin – this picture would not work well with that action as it is white on white so the action would see that blanket the same as it would the background – and you would have a floating head.
These blueprints are so helpful and fun to learn from. I prefer the b&w but that just personal taste.I do agree that the background is distracting from the beauty of that baby’s face…needs somesoftening…I might even play with some colorizing of the letters, but subtly and not to take awayfrom the subject, but to lead the viewers eye towards it…your actions are little miracles…magicis such an appropriate word for the new set! Looking forward to seeing it. xo
I can’t wait until they come out!
Thanks again Jodi for sampling your actions on this photo. Sharon, thanks for your concern on our country. Thanks for your prayers,we’re now slowly recovering after the typhoon.