Featured Products
-
Sale!
-
Sale!
-
Sale!
-
Sale!

-
Sale!

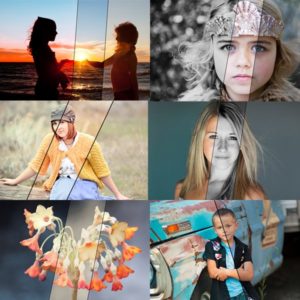
How to Achieve A Consistent Editing Style
Are your photos all over the map in terms of editing style? If so, we are here to help!
One difference between highly seasoned photographers and newer photographers is often consistency in editing. Not that you want every photo to be a clone of the one before it, but when editing a full session, there should be an underlying look or feel. This is one of the hardest things for photographers to achieve.
When photographers buy Photoshop actions and Lightroom Presets, sometimes their editing gets worse temporarily as they struggle to find their editing style. Each individual photo may improve, but every edit looks completely different. Often it looks like 20 people sat down and edited 20 different photos. If you are guilty of this, do not take it personally. You are not alone. Most photographers go through this phase. I am going to explain why it happens and what you can do to break the habit.

Why does this happen?
Simple! Photographers love new gadgets. If you do not already have a strong editing style, it’s easy to get carried away. It’s fun to play with editing tools and to see all the different looks applied to your photos. And though it is entertaining to many newer photographers, it often is a huge time-waster and can lead to a less than professional portfolio.
Consistency Matters
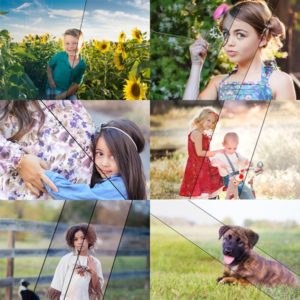
Imagine a wall in a person’s home with three big gallery wrapped canvases. What if each is a beautiful black and white, but one has a pure contrasty black and white feel, one has cool blue undertones and is light and airy, and the third has dark warm chocolate tones? Would that look appealing? Probably not. Now imagine your color photography: You capture a child playing outside surrounded by plants and flowers. You cannot decide which look you like so you edit the image using a hazy, vintage conversion, then a different way with an urban Photoshop action and lastly try a bright, color pop look. All look nice, so you show the customer three of the same thing… Yes, it gives them options, but they hire you as the expert. It is your job to help them pick what is best. It’s not to say you cannot occasionally show a black and white plus a color version for a few photos. But I recommend not showing every photo in both versions for an entire shoot – or showing three styles of black and white from one session.
How can you, as a photographer, get a consistent editing style?
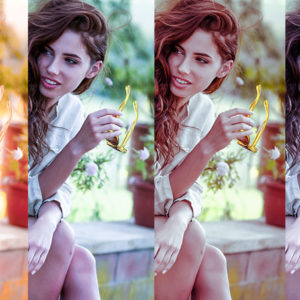
- Define your editing style. While your look may evolve over time, and you may wish to update your website and portfolio, do NOT let it evolve in the course of a single session. For each session, pick a style or feel and stick to it. If you did two completely different scenes, like downtown urban shoot and an indoor white backdrop, then think of those as two sessions within a session. Another exception is if you are making a special image into “fine art.” Then that one image can part from the rest. When it comes to photos in the same lighting and location, do not make some warm toned, some cool toned, some hazy and some color popped.
- Set aside playtime in Photoshop and Lightroom. When you buy new products like actions, presets, plug-ins, textures, etc. set aside time to get to know them before editing a session. Use them and experiment with them and see what tools you like best. Learn how various actions and presets impact your images. For MCP Actions, watch our video tutorials for each action set linked to on every product page of our site. Also follow along with our step-by-step Blueprints as we post them on our blog and Facebook Page. Another fun way to learn to edit is to participate in editing challenges on the MCP Facebook Group. This way, when it comes to real editing, you will edit more efficiently.
- Pick a few actions or presets that achieve your look and stay with them. Once you have a formula that works, stick with it. Use the same actions or presets on all the photos from a specific shoot that were in the same lighting and setting. In Photoshop, if you are an advanced user, you may even be able to make a batchable action that you can apply. In Lightroom, you can save a combined preset and apply it to the images, or use the sync feature.
- Speed tip – use paper and a pen – take notes. You might be thinking, “what does pen and paper have to do with editing pictures on a computer?” Everything! Do you ever look at our step-by-step Blueprints? You will see the steps used in each image. For Photoshop edits, we often even share layer opacity. This concept can help you. Document your steps used on a photo that represents a group of images that have a specific lighting, setting, etc. Assuming your camera settings did not change, you can edit this photo, write down every action used and each manual step taken, and lastly note opacity of layers and changes made. Then, as you edit your next image from the same location and light scenario, you just follow the recipe, adjust opacity, and save. If the photo needs a slight tweak in color tone or brightness, you can adjust it once it is very close to the other edits. This will not only get your photos looking like they came from the same highly skilled photographer, but also save you a TON of time tweaking, guessing and processing your images.
I hope this information helps get you on the road to faster, better photo editing. And remember, this is just my opinion. How do you feel about the importance of consistency in editing?
No Comments
Leave a Comment
You must be logged in to post a comment.


Recent Posts


This helps me SO much. I have been struggling with what my style is and even trying to find my own unique style. The part that helped most was when you said per session. I photograph nature/wildlife yet want clear crispy color for that but my family (sister in laws) do not like my clear crispy color for them. They definitely want more haze. So even looking at two different styles, depending on what my subject is, really clears up some frustration. Thank you!
This is very helpful! I am going to get better!
Have you been reading my mind??? LOL Thank you so much for this article! I seriously have been thinking about this A LOT the last cpl of days. Also, I have a “situation” for you. My daughter and I work together on most of our shoots. We have a little it of a diference in editing styles (not huge tho). What would YOU suggest we do to make sure that the photos in each session look similar?
… make that a “little BIT of difference”. LOL I need to proof read better! 🙂
…make that “a little BIT of a difference”… I think I need to do a better job of proof reading! 🙂
This is not just your opinion–it’s the voice of experience!
Thank you so much for this! After every shoot, I dread editing because it takes me sooo long and yes, I am all over the place in terms of warm vs cool or even warm vs warmer, etc. I love to shoot and do thing differently but then the thought of post processing has been dragging me down!. The advice to pick a few presets and stick with those as opposed to being all over the rainbow (my insertion, because that is what I am, lol) was sooo helpful for me! Even the advice to maintain an overall feel for the specific scene/setting was wonderful since I often find myself with different looks for multiple or even single photos! I <3 u guys!!Thank you! Thank you! Thank you!
Very insightful, thanks for sharing 🙂 For taking notes, I find it also helps to cement the memory because it’s one thing to tell yourself “Ok remember this forever”, but those thoughts can fade away pretty fast. From personal experience, I’ve also taken to storing my notes online so I can access them anywhere on the go… with tools like Google Drive (for documents and spreadsheets) or Evernote with the added benefit that you can keep those notes private.
My problem is I like so many different styles, and at different times/stages in my life! I have found though that lately I’ve been sticking to a vintage look which works well with all the photos I’ve tried it on (I made it into an action)…which is something I was looking for. But in a few months, I might like something else!
Thanks! I actually have developed a style. And I was feeling like I should be using different looks, cross process, vintage, etc. I could never get them to look “right” and usually went back to my rich dark jewel tones. I’ll still play and experiment, but now I don’t feel as if I’m missing something.
I could be the poster child for all-over-the-map-edits! Thank you so much for sharing this, it’s helped narrow my focus 🙂