Featured Products
-
Sale!
-
Sale!

-
Sale!

-
Sale!

-
Sale!


Layering Lightroom presets – yep!
Have you every tried layering Lightroom presets? It’s fun and can help you create nearly unlimited looks. But here’s the catch, most companies don’t build stackable presets. 🙁
This is one of the many reasons I love using MCP’s Enlighten presets for Lightroom 4. The possibilities are endless and you can make some amazing, artistic edits without leaving Lightroom. One catch, you still cannot stack two items that use identical settings… well you can, but not without our secret trick. In today’s tutorial, I am going to show you how to make the presets even a little more flexible using the IMPORT-EXPORT trick. Just wait… you’ll love it.
Here’s my Step-By-Step Blueprints:
We have all taken a photo, or two, where we have forgotten to change the camera settings. Here is one photo that I forgot to change the settings. This was going to to in the trash bin, until I started playing with it.
This is the straight out of camera image:

I used the following presets from MCP Enlighten:
- open shade white balance
- adjusted the lighting by 1 2/3 stop lighten
- soft & bright B&W for the style
- overlay of ginger
- adjusted midtones
- shadows
You can always use brushes to bring out more details or make it softer. Crop the photo if needed, then export to “same folder as original photo.” Here is the first edit after the above steps.

The Import-Export Trick:
Next, since you can still only stack one overlay at a time from the set, I used the “export/import trick.” To do this, you export the photo to the same photo as the original and then import the edited photo back into Lightroom. Next you can add one of the overlays. In this case “shadows: rose.” Then I exported that photo to “same folder as original photo” just like before.

Once again, I imported that last photo back into Lightroom again and add another overlay such as lemon water. Export that photo just like before.

Once more import that last photo with the shadows: rose/lemon water over lays and add another overlay such as pomegranate.

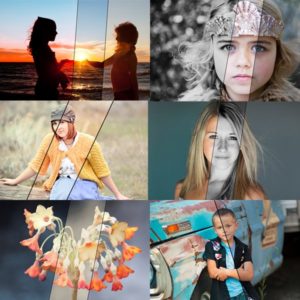
Four different looks from one photo using different Enlighten overlays section.
You can always change the look any of these photos by using a new style or tweak the colors. Playing with the vibrance sliders will add more looks to your photo. The Enlighten brushes will allow you to bring out more details or soften the look. The possibilities of overlaying like this are truly endless.
Sue Zellers a self taught amateur photographer who tries to capture the beauty and wonder of nature. She lives in beautiful farm countryside with her husband & 2 dogs, who are her other photo subjects.
See her work here: http://500px.com/sueze or Follow her on Facebook.
No Comments
Leave a Comment
You must be logged in to post a comment.


Recent Posts


In the Import/Export trick…I find a time saver to stack overlays…is to simply, “Edit In” Photoshop…allow the image to open with the first preset, then immediately close it…as a TIF file is being created in LR…then go to that file…and add the next preset overlay….fun, fun, fun..no need for Import/Exporting…just a simple “Edit In” Hope this makes sense…Aloha and mahalo, t-
You are so right Troy, but there are some people only edit using Lightroom. So this was written to help those people that do not use another photo editing program. 🙂
That is a great way to do it was well. 🙂 So many ways to do similar things in LR. If you do not have PS, then the way in this post still makes sense. But with it, your way does sound like a fantastic idea.
A quick question, are you exporting as a tiff or jpeg?
It would not matter if it is a tiff or jpeg. Either one will work. 🙂
You can also create virtual copies of the original image with the other presets added. Take to PS as ‘Edit as layers’ and they are all stacked above each other. Edit as required 🙂
This would work too – blending multiple images – stacked as layers. Unless you do not have PS… One complaint people have about LR is lack of layers and opacity adjustments. You can also pull into PS the unedited and the edited as a layer and adjust that way. Thanks for sharing your way with us – love all the ideas people are giving.
I do the same as Troy – much easier. Beautiful photos and this really shows the diversity of Jodi’s presets – love them!!
Not having tried your presets, could you not simply apply one preset, create a Virtual Copy with that applied then apply a second to that VC, etc? If you wish you can even set the third VC (in this case) as the original file in LR.
You would need to somehow get them out and back in or stack them (in order to stack the looks). See my comments to others and yes, some of the ideas would work. This post shows one way to do it – the way the author does. 🙂 Thank you for sharing your ideas.
Great trick Sueze! And thanks for the extra tips Troy and Julie. Gonna play with this later – sounds fun!