Featured Products
Oh no! What do you do when you are photographing and it’s just way too contrasty? Or when the sun is right over head and you want to avoid those “raccoon eyes”? Reflectors are the best way to combat both of these issues! And they are super easy to use!
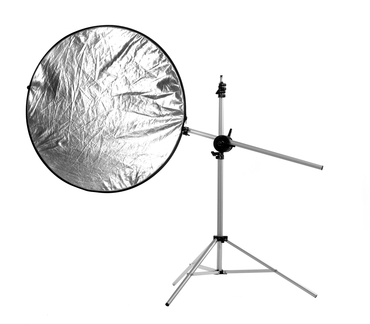
There are many different sizes and shapes of reflectors. For the purposes of this post, we will talk about the two that we use here at Frameable Faces, the full sized 48”x72” stand up reflector and our on-location reflector, also known here at our studio as Reflecto (He’s about a 36” disc reflector).
Using Reflectors In A Studio Setting
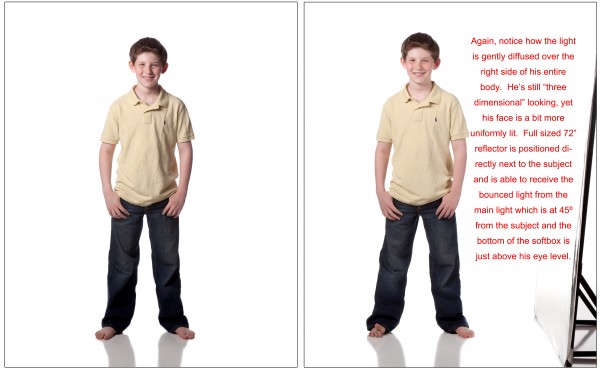
In the studio, we use the stand up reflector during every single session. If you have your main studio strobe light set to MODELING or CONSTANT, you’ll be able to see where the light is bouncing onto your subject, based on where you position the reflector. We have ours on the client’s left side so we can bounce the light from our main light onto the subject.
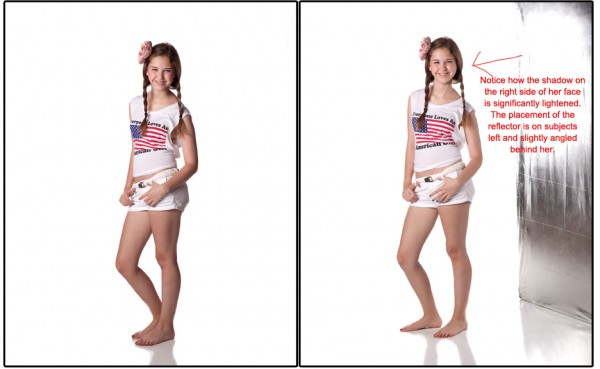
The reflector gently fills the shadows on the subjects face without “flattening” the final image, so you can still get the true “depth” of the face and the facial features. You can use the reflector on any color background, just make sure that it’s close enough to the subject to successfully bounce the light onto him or her, but not so close that it will be a photoshop nightmare to clone out the shadows on the floor. Trust me, that’s not fun!
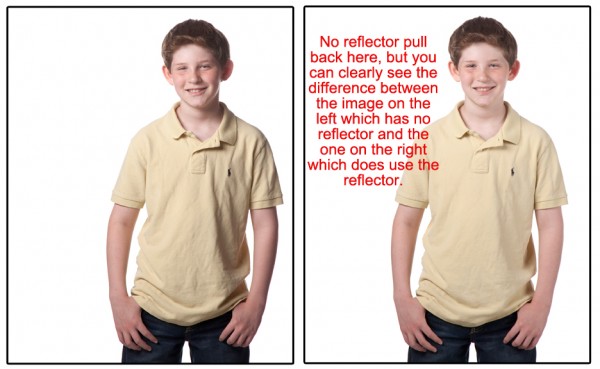
If you are using the reflector on a black or white background, it is easier (in my opinion) to move the reflector closer to the subject, allowing a more intense bounce light. If there is a resulting shadow from the reflector, that is easily corrected in post.
The placement of the reflector is important. Position it next to your subject, opposite your main studio light,, yet slightly behind him or her. If placed too far in front of your subject, the light won’t bounce as effectively. Angling the reflector will allow control over the amount of light on to your subject.
Using Reflectors Outdoors
For on-location photo sessions, we use Reflecto. He’s our snarky, sometimes-rogue, reflector and he actually tweets at @Reflect_o. He can change colors, too: silver, gold and soft white. We almost exclusively use the silver color. Often, when we are outside, we have to reflect the sunlight (or the ambient light) on to our subject’s face. Whether it be to create light in their eyes, or to fill in any dark shadows, your reflector will come in handy.
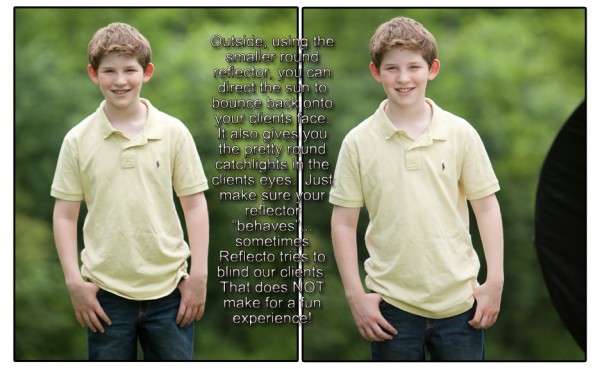
Reflecto also has an alter ego…Block-o. When the light is too bright, overhead or is stippled, using the black side of the circular reflector to block the light is a perfect way to help your situation. Of course, you’ll need an assistant to hold the reflector. If you don’t have an assistant, mom or dad can usually step in with a little bit of training if you are photographing seniors or kids by themselves. Again, with the reflector, it’s easy to see where you’ll be reflecting the light into the subject’s face or blocking the light from the face.
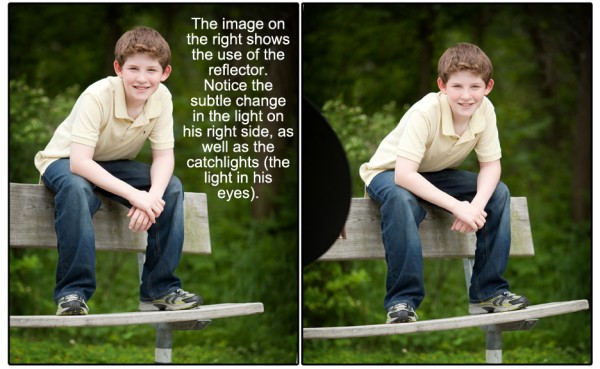
With a little bit of practice, it’s pretty simple to use reflectors to implement soft fill light into your photographs. But what if you don’t have a reflector already?
Making Your Own Reflector
Almost anything that has a light surface can be used as a reflector. We’ve used white poster board or a small sheet of white paper or even the sidewalk. But if you want to make something a bit larger, it’s pretty simple to do. Jodi has a full tutorial on making a DIY Reflector. Just click the graphic below.
Depending on how much, or how little, light needs to be reflected (or blocked in some cases), a homemade or purchased reflector can definitely help take your photography to the next level. And if you don’t have a reflector with you or you wish you had more light on your subject, MCP has you covered. Though it’s always best to get your light when taking the picture, if you need more, try MCP Photoshop actions (Four Seasons, Fusion and Bag of Tricks each have actions to add light) and Lightroom presets (Enlighten has presets to add fill flash/reflected light).
Ally Cohen is a co-owner of Frameable Faces Photography with her husband Doug in the Orchard Mall in West Bloomfield, MI. Ally is the photographer and Doug handles the sales and marketing. Ally and Doug have been in their retail studio space for almost 5 years and you can follow their blog here. She lives in suburban Detroit with Doug, their two awesome kids, and their two cats.


