Featured Products
Thank you to MCP Guest Blogger Sharon Gartrell for this post teaching how to feather window light. This should come in handy as the temperatures drop.
Using Natural Window Light Creatively
Winter is now upon us and many of my fellow natural light photographers are bemoaning the loss of the beautiful scenery and warm weather. The coming of winter doesnʼt mean that you either have to put your camera away until the first buds of spring appear or that you have to spend thousands of dollars for in-home studio equipment. Window lighting is an economical and beautiful option to explore.
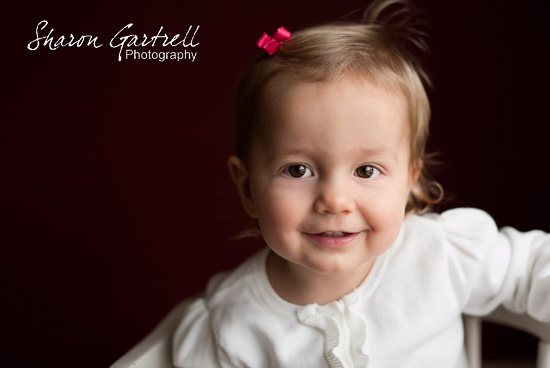
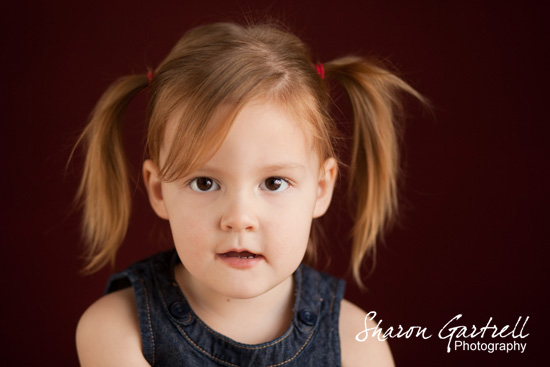
You can use the windows in your home to mimic the effect of feathering studio strobes. This produces beautiful images with directional light that feathers across the face of your subject. I love using directional lighting indoors because I think it adds a beautiful dimension to your images.
Hereʼs what you need to do:
1. Find a large window in your home, preferably on the north side of your home. Unfortunately for me, the only suitable windows in my home are on the east side of my house. I can still make this work by limiting my shooting times between the hours of 10:30am-1:30pm. The window acts like a large softbox and creates beautiful catchlights in the eyes.
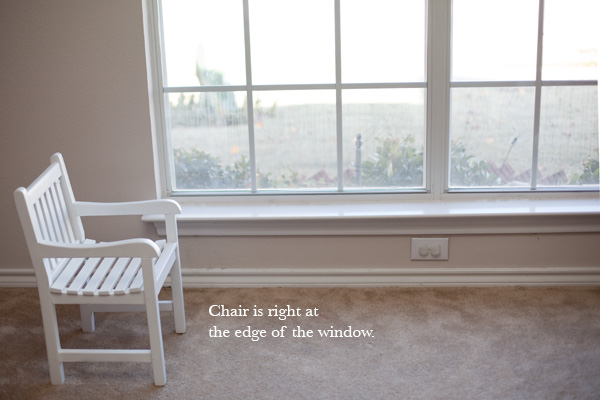
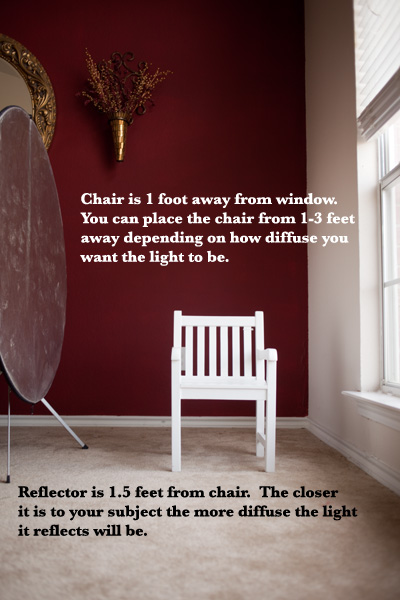
2. Place a stool, table or chair right at the edge of the window (see pullback 1 below). You will want the chair about 1-3 feet away from the window (see pullback 2 below). Remember the closer your subject is to the light source, the more diffused the light will be. This positioning will put your subject right at the edge of the light, just like when you feather a strobe you are placing the light so it’s edge is just at your subject. You will need to elevate your subject so that they are even with the window. Always use common sense when photographing a baby/small child and have another adult there to spot the child while you are shooting. The childʼs safety is always of the utmost importance.

3. Turn off all the lights inside the room you are shooting in. You don’t want tungsten and halogen bulbs messing up your colors and white balance. I take a custom white balance using a digital grey card.
4. Sometimes I use a reflector opposite the window when I want to brighten up the shadows on my subjectʼs face (see pullback 2 below). If you want a more dramatic look, donʼt use a reflector at all or move the reflector further from your subject.

5. Try this technique at different times of the day and see what the results are. The lighter it is outside, the more ambient light will be in your room and the brighter the shadows will be. If you try this when it is darker outside (like when it is raining) there will not be as much ambient light in the room and the result will be much different.
6. Finally donʼt be afraid to get creative with this. Angle your subjectʼs face toward the window and then away. Move your reflector. Use the light and shadows to mold your subjects face. The only limits are your creativity.


17 Comments
Leave a Comment
You must be logged in to post a comment.


Love this! Thank you for sharing.
Thank you for the great post, wonderful information!
Very Helpful. Thank you so much for the great detail on setting this up. Can’t wait to try it.
Great post and great info. Once again, thanks for sharing!
Thanks for the pointers! I’m just starting out so any advice is appreciated!!
Great tips! I love seeing pullback shots!
thank you soooo much for this! i am an outdoor girl and this is sooo helpful.
GREAT tutorial Sharon! Thanks for sharing with us!
AWESOME Tutorial!!! Love Sharon’s work!!!!I love natural light so this is GREAT information!
Great article. Thanks and Merry Christmas.
Oh! I really like this and want to try it sometime soon. Thanks! 🙂
Jodi, need to set up a conference call with you after the new year. Ran into a snag installing into my photoshop.
thanks for this tip Jodi!
thanks for this useful article
Great article, thanks for sharing. Some other ideas: try standing in front of the subject, facing the window. If you under expose the image the subject will be a silhouette against the window. If you over expose the image so that your subject is properly exposed the window light will be pure white which is also a beautiful effect. Walk around your subject and see the different ways the light plays on their face.
another tip I would also add is that if you want even greater contrast on your subject, instead of just forgoing the reflector you could use a black bounce like a flag or the dark side of a reflector to create some negative fill. you’ll darken up your shadows and create a bigger stop difference if you want that. just depends on what kind of light you’re getting. you can do that outdoors too if you have a big enough bounce. and you could even put a white bounce opposite that too on the key side if you feel like you need that. works pretty well if the light is really diffused and you feel you’re not getting enough contrast.
hi i tried this once or something similar to this and the wall was extra bright on one side why does this happen? it as against a purple wall and the side nearest to window was almost white in the pic