Featured Products
Shooting in full sun…..yikes, it strikes fear in the heart of many! It’s not as easy as overcast skies but sunlight adds specularity and contrast to a photograph that a flat overcast day will never yield.
So, let’s start with shooting in the middle part of the day. It’ll never be as good as shooting early in the morn or late in the afternoon, evening. But it is possible…especially with kids older than 3yo. You can still get toddlers at this time but seriously try to avoid it unless you can get plenty of shade because you can guarantee they’ll give their best pearly white smile, when their face is half lit and half in shade hehe.
So what to do when someone can only do a session at midday? And believe me it does happen, I recently had a family whose Dad was only in Melbourne for a few hours and could get to me at 11am the earliest. In these situations there are a few tricks that you can employ to pull something out of the box.
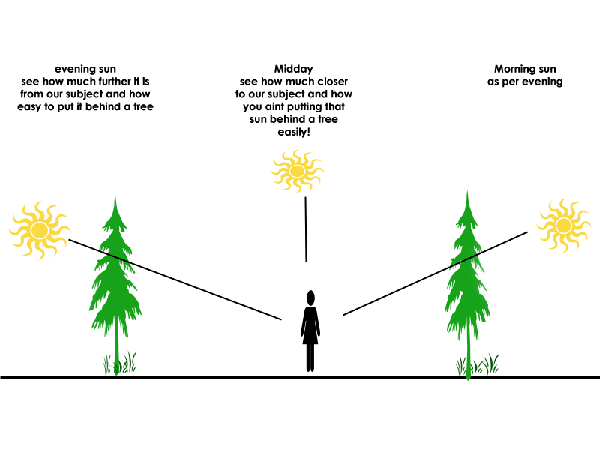
First let me tell you why early morning and evening light works best. The sun is lower to the horizon and is further away from us than at midday. Therefore it has to travel through more atmosphere, which diffuses and softens the light. As sun is low in the sky, it is easy put it behind your subject, or behind a tree, or a building, and the shadows from the trees and buildings are longer giving you more room to work. In addition the shadows are longer and not as dense and the highlights aren’t as bright, ie – not as much contrast.

Now keeping this in mind it is quite simple to shoot in the middle of the day. In the early morning or late afternoon you can put a tree or building behind your subject to block the sun. We do exactly the same in the mid afternoon BUT, your subject will need to be very close to the shade source as the shadows are short. OR you’ll need to get down low to shoot UP at your subject as SHOOTING FROM BELOW YOUR SUBJECT PUTS THE SUN BEHIND THEM or a tree or whatever. Shooting up at a subject is usually an unattractive angle BUT by getting them to lean forward over their belt buckle will change that angle and make it attractive. This simple little bit of knowledge makes the ‘impossible’ now ‘POSSIBLE’ – yayayayay!
These next few images I took between noon and 1pm. It was my son’s 6th birthday and it was in the January (midsummer here in Australia). Now let me say that our sun down-under is so harsh and bright, the only sun I’ve found brighter is in Northern Australia! On this day we were at a park with some trees that only gave dappled shade.
In the below image, my son was at the top of the slide and I down on the ground. By getting him to lean over the top and look down at me I got the sun behind both him and a tree.

The next trick is to look EXACTLY at where the sun is placed. There is only a very short time at the absolute middle of the day where the sun is DIRECTLY overhead. This means that you can turn your subject so that they are in front of the sun even if only by a little.
In the next image I got my daughter to turn away from the sun, I do have some shadow from the peak of her hat and a teeny bit of side-lighting but it is a sale-able image regardless. I would have done better to take the hat off.

And I’ve done the same thing with the image of them on the slide, I’ve employed 2 tactics here, getting the sun just the teeniest bit behind them AND I’ve crouched down low and shot up at them to get the sun right behind them and the trees behind. I have some hot spots on my daughters arm but I wouldn’t hesitate to sell this image

You can also use any shade that you can find. In the below image, you can see here I have the TEENIEST bit of shade but I used it. Shooting from above and getting him to look up toward the lightsource (sky) has lit up under his cap and his eyes too. You can see where the shade ends, in fact his forearms and hands are bright and have some hot spots.

FIRST TREE OF THE FOREST GUIDE
Another tool is the ‘FIRST TREE OF THE FOREST’ guide. Simply place your subject in front of the first tree of the forest (or park in this case). By putting them under the first tree you block the downward rays from the sun, and because the forest is behind them, and they are looking out to the open and bright area, it lights their faces and their eyes. It is the same principle as placing your subject in a doorway looking out, or that yummy garage light. You’ll get awesome catch-lights when you do this.
Here my daughter is under the first pine tree of a clump of trees. The light under these trees was dappled (see the spotty light behind) so I had to put her right up next the trunk.

This next picture employs the same principle. Only instead of a tree it is a tunnel. If they were on the other side they would be lit by direct harsh sunlight. You can clearly see how overhead the sun is here by how little the shadows are. They were facing a very bright sand pit which worked as a natural reflector (but was a bit too glarey for my light sensitive boy).

THE IMPORTANCE OF DYNAMIC RANGE
I need to digress a little here, and I hope it isn’t too techinical, but it is so important as it directly affects us photographers.
Our cameras, typically, are capable of recording 5 stops worth of exposure. So from the darkest pixel to the lightest will only be 5 stops.
Now there is our conundrum, our big problem – most outdoor scenes are approx 10 stops. So we have a camera which is able to record 5 stops worth of information, which means that there is 5 stops that our camera is unable to capture, these are our clipped shadows and blown highlights! All we need to do then is reduce our dynamic range, thus making it possible for our camera to record more information.
There are 3 ways to do this in full sun.
Fill flash
Reflector
Diffuser
If your subjects are old enough to sit still you can use a reflector or a diffuser.
A REFLECTOR lifts the exposure in the shadows and does a couple of desirable things…
- reduces the exposure range by adding light and lifting the dark shadows,
- lights up the eyes and gives a catchlight,
And you don’t need to learn fill flash and ratios to do this, it is visually obvious when the light is hitting your subject right!
And a reflector can be anything from a purpose made photographic one, to a sheet of white coreboard, a light coloured wall or bright window, the sea, the sand, the concrete on the ground or even someone in a white shirt!
I used a reflector in the image below, see the sparkle in her eyes, without it she’d have been very underexposed.

Sometimes you will come across some people who are really light sensitive and can squint at the light bouncing off the reflector.
This is when we’d use a DIFFUSER.
A Diffuser works by subtracting exposure in the highlights, and in diffusing them. The diffuser is placed between the sun (or light source ie window etc) and decreases the exposure range by subtracting light and therefore reducing and softening the highlights
Diffusers are great for squinters as it reduces the intensity of the light and doesn’t throw bright light into their faces.
You can buy photographic diffusers, most 5in1 reflector kits will have one! But using tree foliage, net curtains, anything that you can filter the sun through will act as a diffuser.
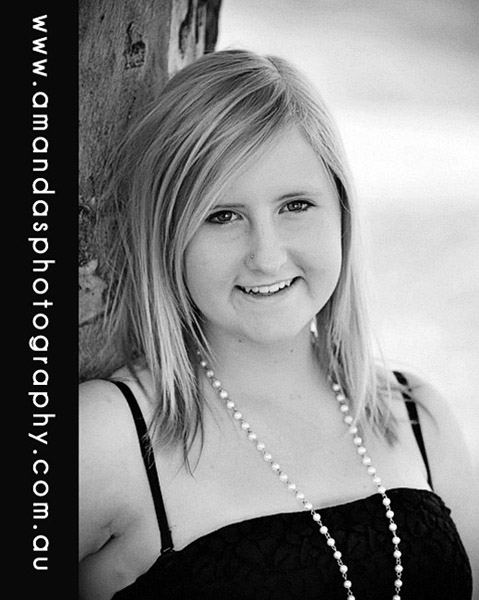
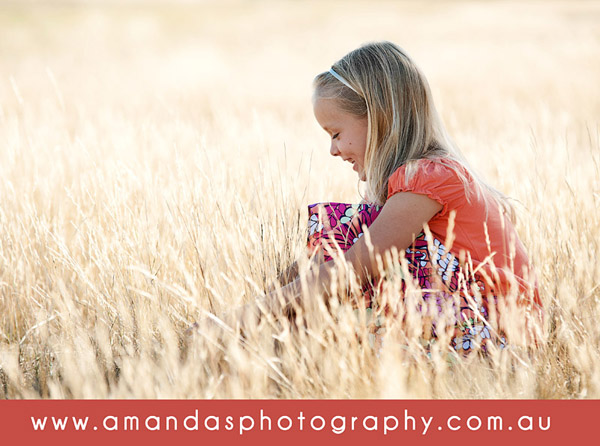
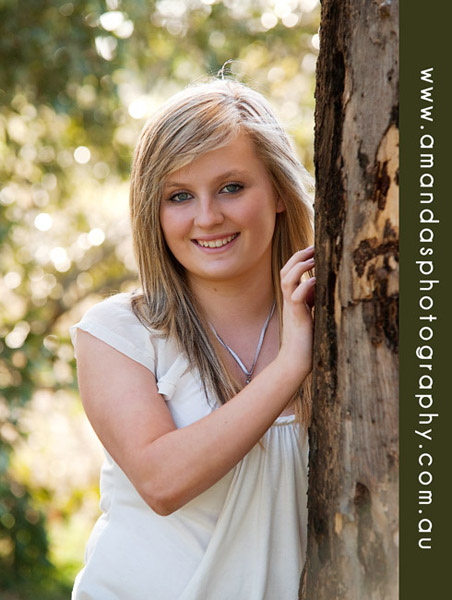
The below photos were taken with a diffuser.
The photo of the little girl was taken late in the morning (around 11am), see how soft the light is on her hair. If I’d not used the diffuser her hair would have definitely blown out.

This photo of the teen was later in the afternoon and the sun was coming in behind. I needed the diffuser to keep her hair and her shoulder exposed correctly.

When all is said and done, have a go – it’s not that scary! Take the time to see the light, and where it’s coming from. This will help you more than anything I can ever write!
Amanda is an established portrait photographer and owner of Amanda’s Photography, Melbourne, Australia –www.amandasphotography.com.au She specialises in photographing babies, kids and families both on location and in her Melbourne studio. Amanda’s Photography has been in business for 10 years, so Amanda has extensive experience in shooting outdoors in the harsh Australian sun – “Once (the sun) was my worst photographic enemy, now my best friend”!
No Comments
Leave a Comment
You must be logged in to post a comment.


Great post! Thank you for the helpful information!!
it was really nice post! awesome :)thaks for sharing..
Thank you for the great post! Would you mind telling us the kind/brand of diffuser you used for the little girl in the field?
Hi Karen, I have a few different sized reflectors and kits and they are all cheapies from eBay 😉 That was my 1 meter oval one in this pic.
Thank you,thank you,thank you 🙂 I have a shoot on Mon and their only available time is 1pm I think I’m feeling a little more confident 🙂
Great tips from you..i really loved your captures
Just what I was looking for, thank you!!