Featured Products
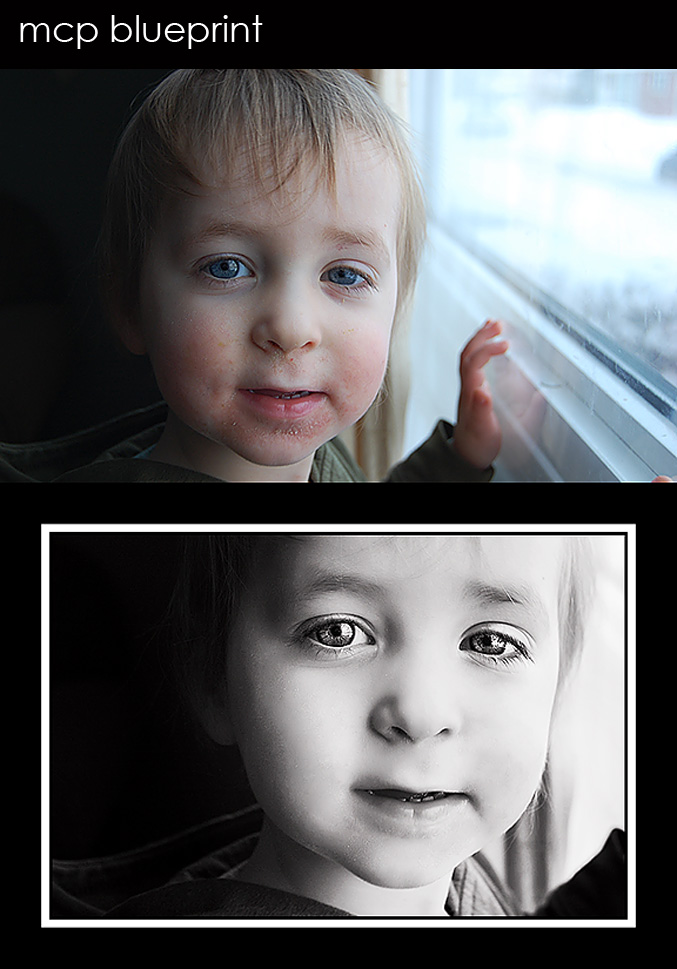
This photo was sent to me from I Heart Faces website for their Fix It Friday Segment last week. The photographer was Amy of muddy boots blog. This little boy is so sweet, but the photo had poor composition, chopped fingers, and a skin problem. The parent wanted the skin issues to vanish. Below is my play with the photo and then step by step directions on what actions and tools I used in Photoshop to improve it. As always comment and let me know your thoughts.

1. MCP Quickie Collection’s “Under Exposure Fixer” – 100%
2. MCP Quickie Collection’s “Crackle” – 66%
3. Used the patch tool on a duplicate layer to get rid of flaky skin problems
4. MCP Magic Skin’s “Magic Powder” – 45%
5. MCP Eye Doctor – enhanced catchlights and sharpened
6. MCP Quickie Collection’s “Vanilla Ice Cream” B&W
7. Cropped
8. MCP Quickie Collection’s “Baby Bear Got Framed”
No Comments
Leave a Comment
You must be logged in to post a comment.


wow! beautifully done!
Fantastic fixes. I love your Vanilla Ice Cream action. Whenever I’m drawn to a B&W photo it seems you’ve used that action on it.
This was very helpful…beautiful plays here, Jodi, and I love your choices. I can’t seem to get the hang of that patch tool…wonder what I can be doing wrong? I always defer to the clone stamp and it takes forever.
I love all the improvements! The new compostion makes the boy the main focus of the photo, and we’re instantly drawn to his eyes! Whereas in the original, my eyes were initially drawn to that bright spot outside the window.
He’s a cutie. You did a very nice job with the skin, but I would have made the eyes a bit more subtle. It’s just a little too cartoonish for my taste.
Wonderful edit and instruction. His eyes are incredible and really draw you in and keep you there. ~Jackie
The way you decided to crop the photo made all the difference! Your B&W processing was the cherry on top 🙂
i love it….thanks for the tutorial….very helpful
Ummm Wow. Gonna have to start saving so I can afford some actions, and some classes! That is GREAT!
Just purchased my Quickie collection …. can’t wait to get started. I’m pleased to see your step-by-step … not so overwhelming for us novices when its broken down like that. 🙂 Great improvements on the photo … not familiar with “patch” …. I’ll have to research that!
love the black and white conversion! but, like natalie said, the eyes are a little too overdone for me. i’d prefer the opacity to be lowered a tad.
I love it! Beautiful work! I’m hooked on your website!