Featured Products

From the time I was a little kid, I was fascinated with the night sky. Whether it was looking through a telescope, watching my oldest sister take star trail pictures, or just staring at the moon – I was in love! It wasn’t until a few years ago that I finally invested in a DSLR camera that I had the opportunity to take my own pictures of the stars. A friend of mine taught me how to do long exposures while vacationing in Utah. I was hooked…until I got back to Dallas and realized there was too much light pollution to take the star trail pictures the way I had originally learned. After much research and a little testing – the door was open for me to take star trails wherever I may be! I’m so excited to pass this information on to you!
Equipment Needed:
- DSLR Camera – Set to Bulb Mode
- Wide angle lens
- Tripod
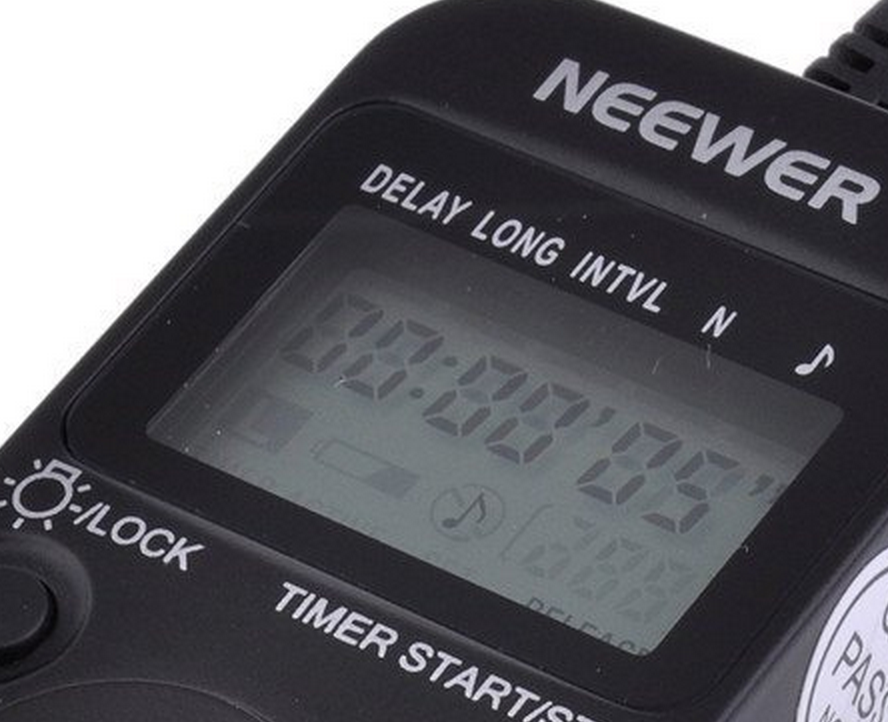
- Intervalometer (Example of what to buy)
- 24 GB Memory Card (Recommended)
- Fully charged camera battery
- Fresh batteries in the Intervalometer
- Some knowledge of the night sky – how to locate the North Star.
Ideal Location/Environment:
- Clear night
- Light or no winds
- Secure location
- It’s nice to have something stationary in the picture as well as the star trail, whether it’s a tree, house, or mountain…really it can be anything you want.

Camera Settings:
- Mode: Bulb
- ISO: 400
- F4
Intervalometer Settings:
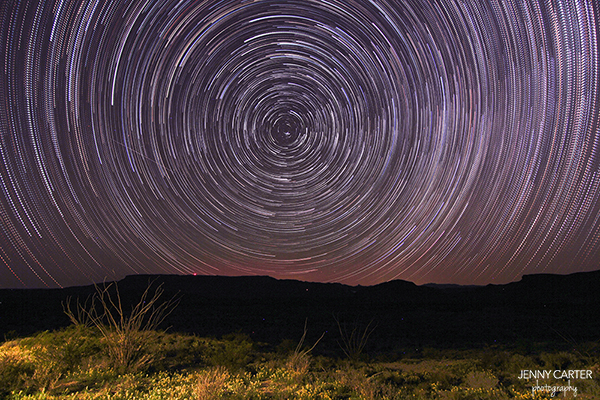
These can vary. It depends how long you plan to leave your camera outside. For the picture below, I shot 200 pictures over a 7 hour timeframe, one every 2 minutes, exposed for 1 minute each. The settings for this picture are listed below.

- Delay: How long before your camera starts taking the picture. This helps prevents any shaking. 20 seconds is a good amount of time.
- Long: The length of time your shutter will stay open. 2 minutes
- Intvl: The time between shots. 1 minute
- N: The number of pictures the remote will take. 200
- Music Note: Turns on/off the chime when taking pictures

So, you are in your ideal location, your wide angle lens is on your camera, your camera is securely fastened to your tripod, and your intervalometer is plugged into the side of your camera.
If you want a complete circle star trail, you will need to locate the North Star. The Big Dippers “cup” points to it – See Illustration.
Put your lens on Manual and make sure your focus is set. For starters, I change it to Infinity, and then make minor adjustments. After you set it, go ahead and take a few test shots at a very high ISO – like 4000. It will allow you to verify you are taking a clear picture. After you are satisfied with the clarity of your picture – change the ISO back to 400.
When you are sure everything is set exactly how you want it – it’s time to start your timer!
Now, it’s time to walk away and wait patiently while your camera does its thing. If comfortable with leaving your camera out – go get some shuteye! You’ll be sure to wake up early to see the results. Once you have captured your images, the fun has just begun. Stay tuned for my next blog to learn how to edit them into Adobe Lightroom and stack them in software such as StarStaX.
Jenny Carter is a portrait and landscape photographer based out of Dallas, Texas. You can find her on Facebook
and see her view her work here.
No Comments
Leave a Comment
You must be logged in to post a comment.


great article. But can you clarify the exposure/shutter settings. One says 2 min interval and the other says 1 min interval for posted photo. Thanks 🙂
1 Min is the delay between shots. 2 Min interval is how long you are taking the photo for — your lens stays open.