Featured Products
It’s a given that creative photographs attract an abundance of people. Conceptual images inspire us to think more deeply about a subject and refresh our creativity. They teach us to look at seemingly insignificant things from a fresh perspective. All in all, they’re fulfilling works of art that anyone can create.
Double exposures are two photos in one – usually a combination of a silhouette and a landscape photo – that tell a deeper story. They can be humorous, thoughtful, or simply awe-inspiring. Most importantly, they’re something you can include in your own work to impress future clients.
In addition to providing your clients with incredible photographs of their family, you could further impress them by showing off your editing skills. Double exposures, despite their intricately designed looks, are easy to create.Whether you’re a budding family photographer or a lover of nature photos, you can create stunning double exposures. All you need is a sprinkle of creativity and an editing program like Photoshop.
In this tutorial, I’ll teach you how to create a compelling double exposure in 9 easy steps. Let’s begin!
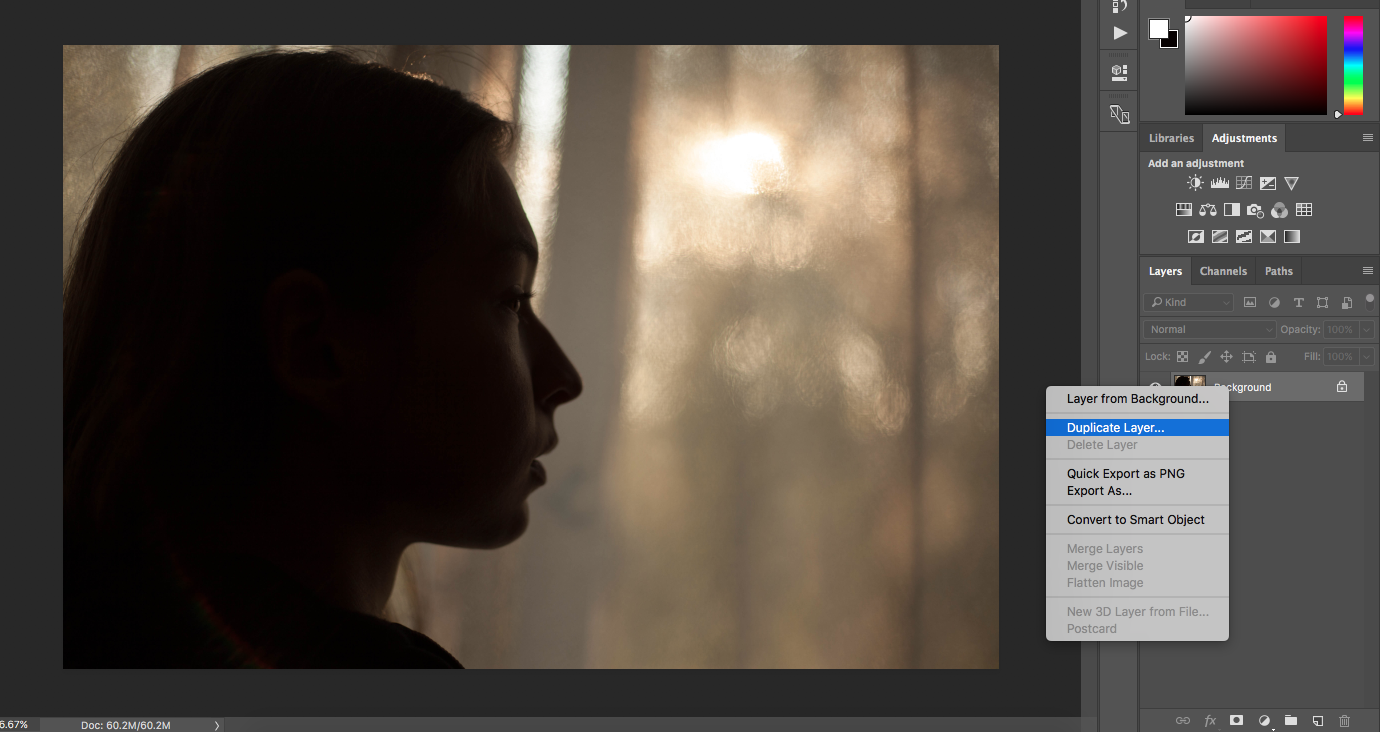
Create a new background layer by right-clicking your first layer and selecting Duplicate Layer (as pictured above).
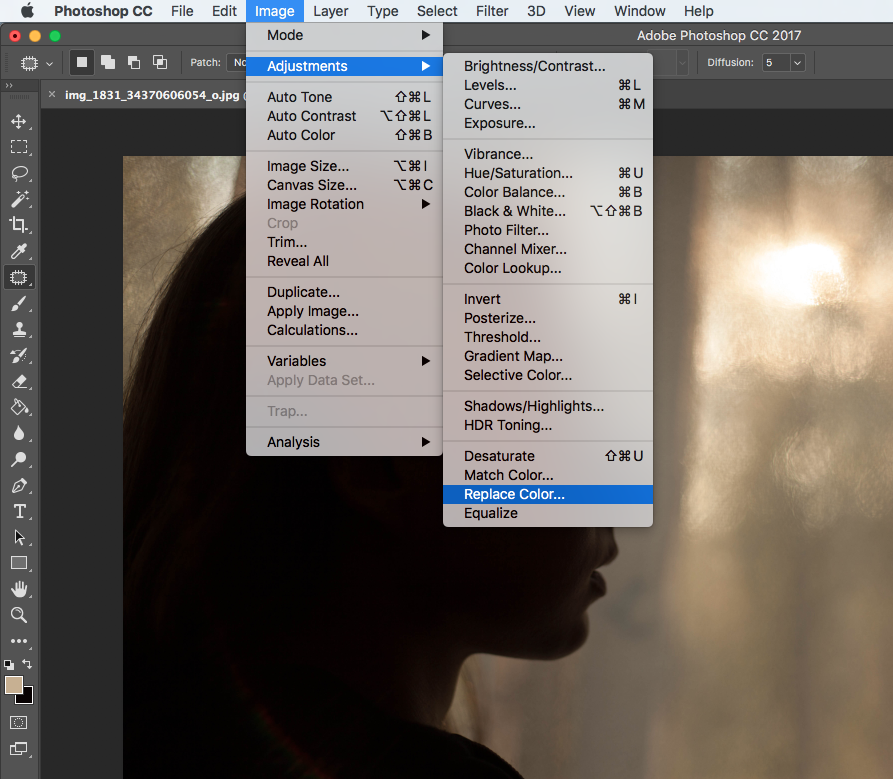
Typically, double exposures work best with silhouettes set against (partially) white backgrounds. Since it’s likely that your silhouette has a background, you first need to remove it. To do this, go to Image > Adjustments > Replace Color.
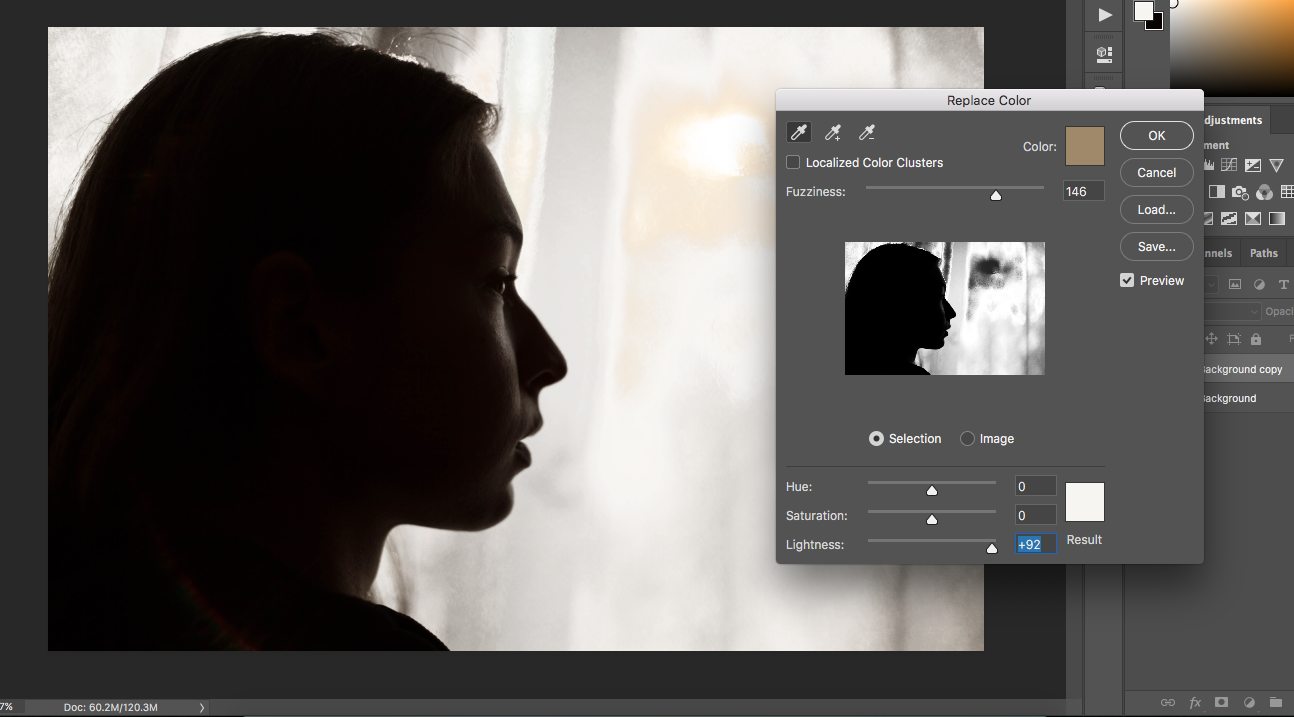
Select your background by clicking on it. Once your desired spot is chosen, increase the Lightness and Fuzziness sections to capture as much of the background as possible. Don’t worry if you can only select patches – you can repeat this step as much as you like; if there are a few blemishes here and there, ignore them for now, too.
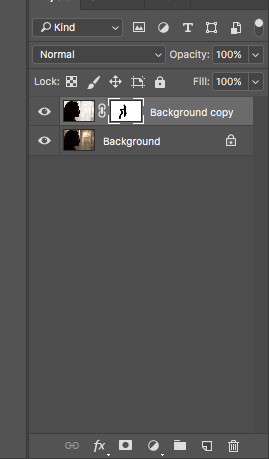
If your subject’s face was affected during the last few steps, click on the rectangular icon with a circle at the bottom of your Layer panel (as pictured above). This will create a layer mask that will help restore valuable details. Once your layer mask is enabled, set your foreground color to black and, using your brush, remove any unnecessary enhancements.
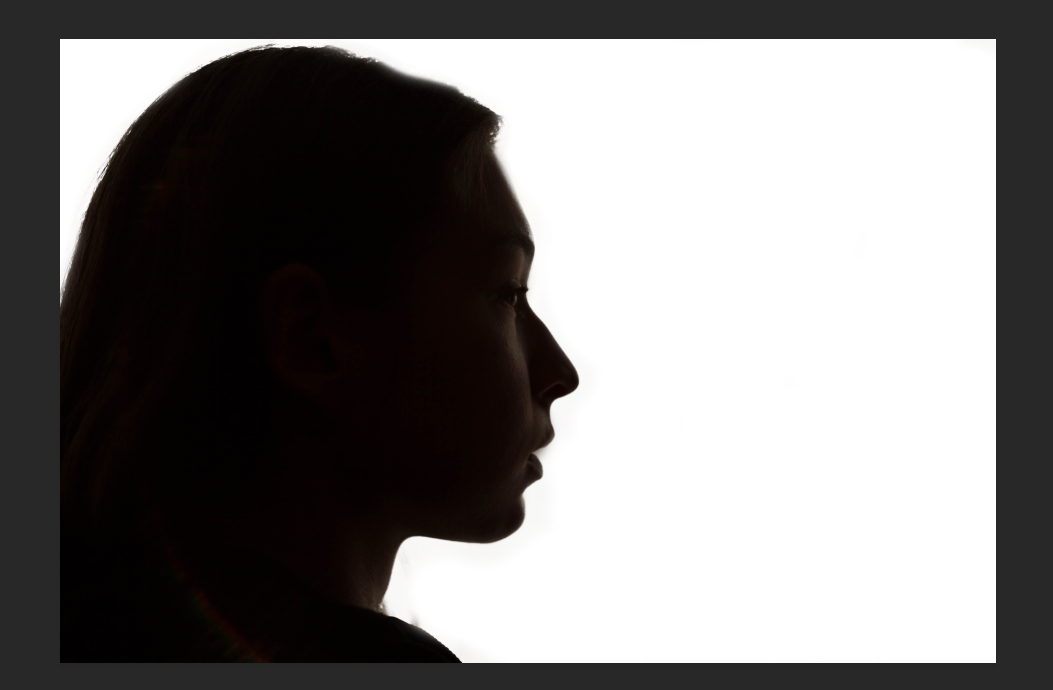
If your background has a few remaining blemishes, click on your second layer (next to the layer mask) and, using a white brush, hide as many colored parts of your image as possible.
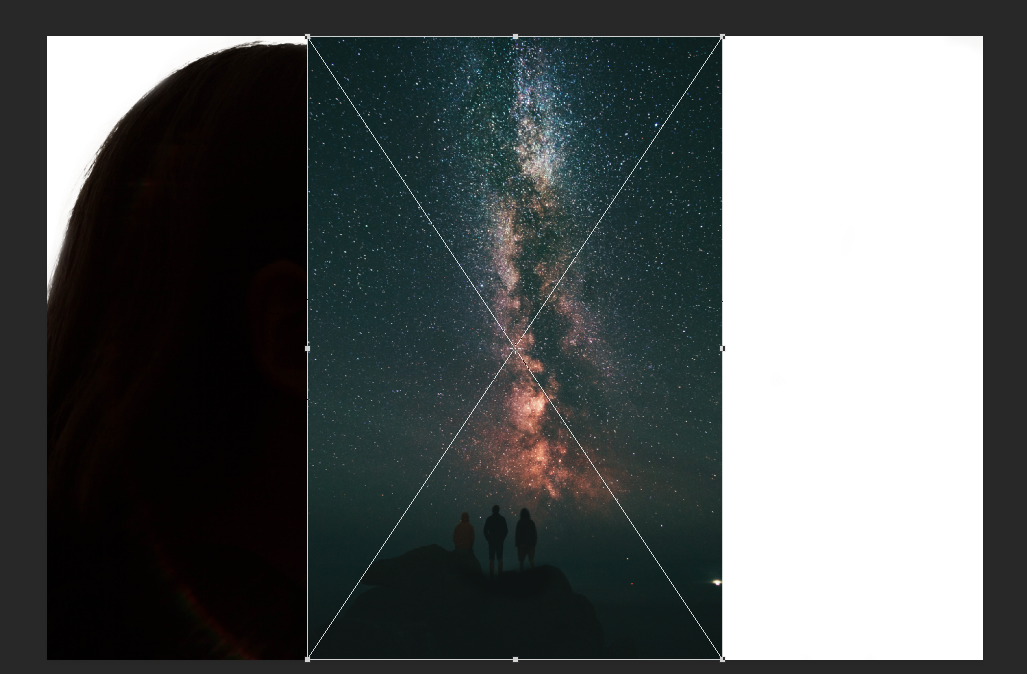
This is the part where your creativity can thrive! Flatten your image (Layer > Flatten Image) and add another image to your current layer. This can be done easily by dragging the image from your folder to the program.
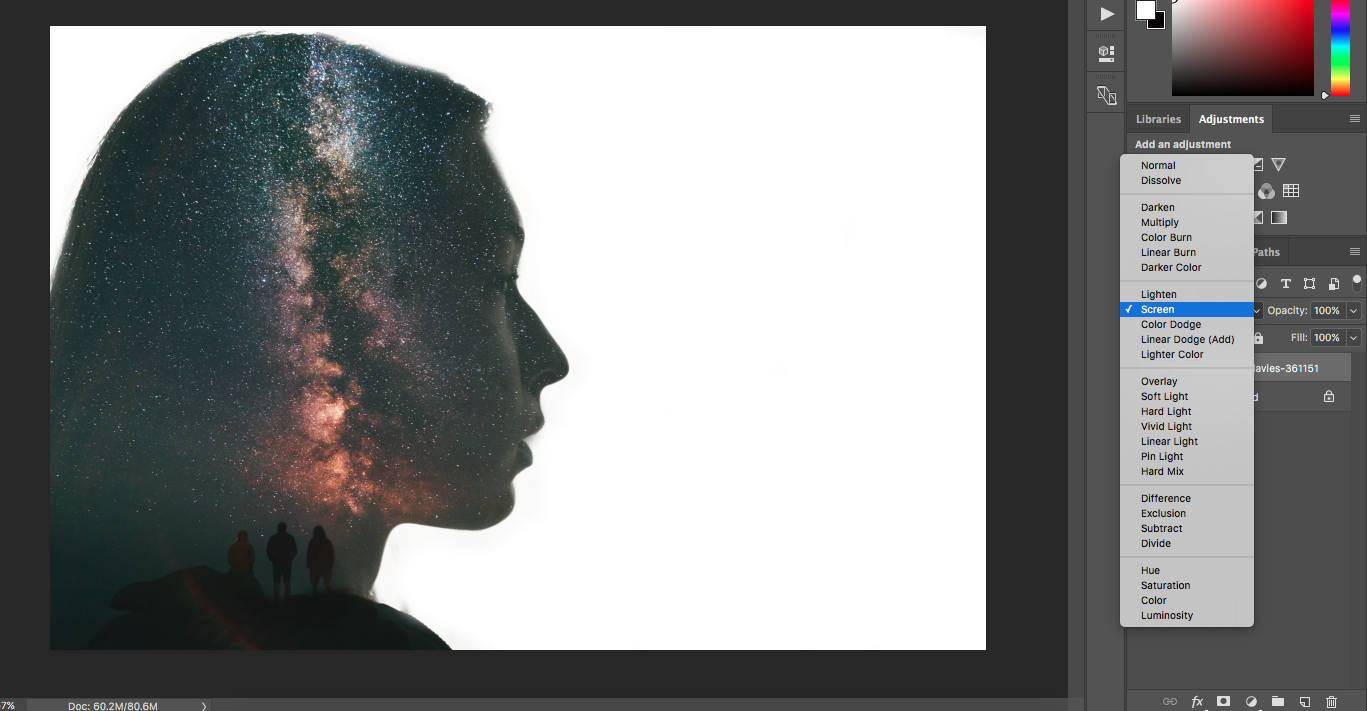
Making sure your new image layer is selected, click on the bar above that says Normal, and change that to Screen. Adjust your image as much as you like. There are no limits when it comes to double exposures. The more creative you are, the better! 🙂
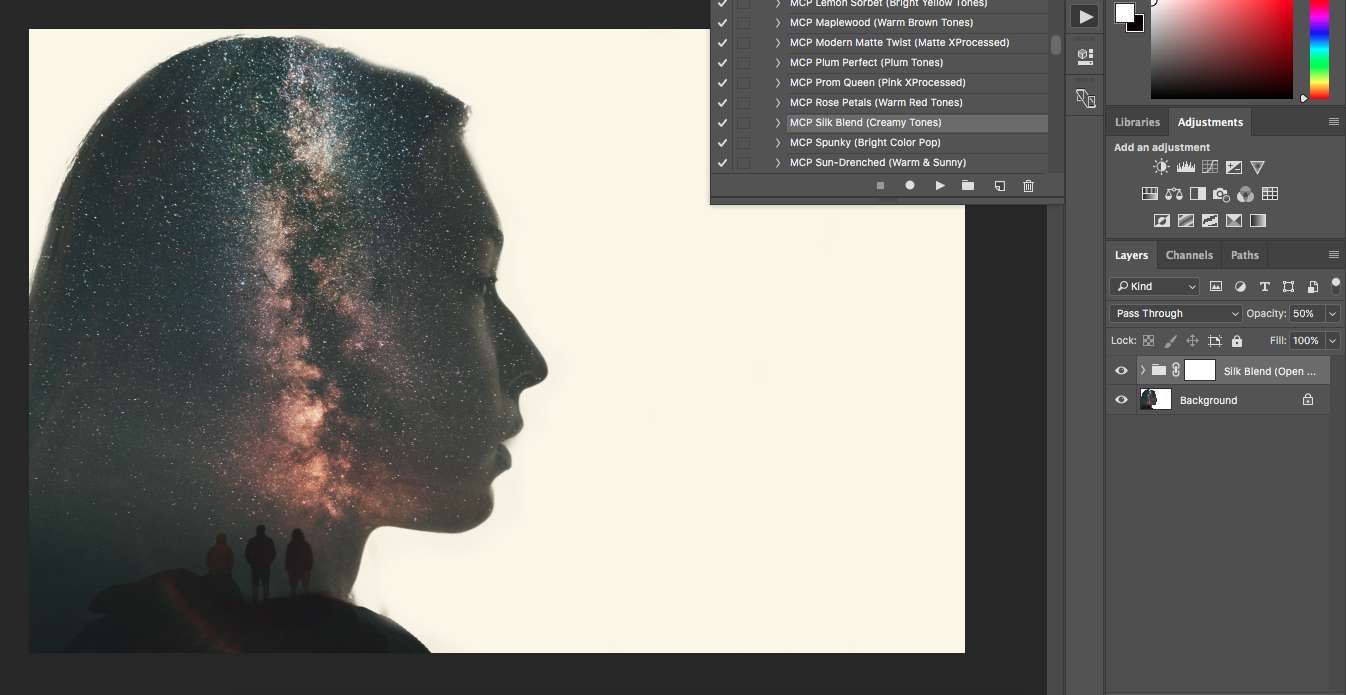
Once you’re happy with the results, flatten your image and color correct! Since the background is white, we can make it stand out using Photoshop actions. Go to Window > Actions, and select your favorite for an instant photo booster! For this image, I used Silky Blend (Creamy Tones) from MCP’s Inspire Actions set.
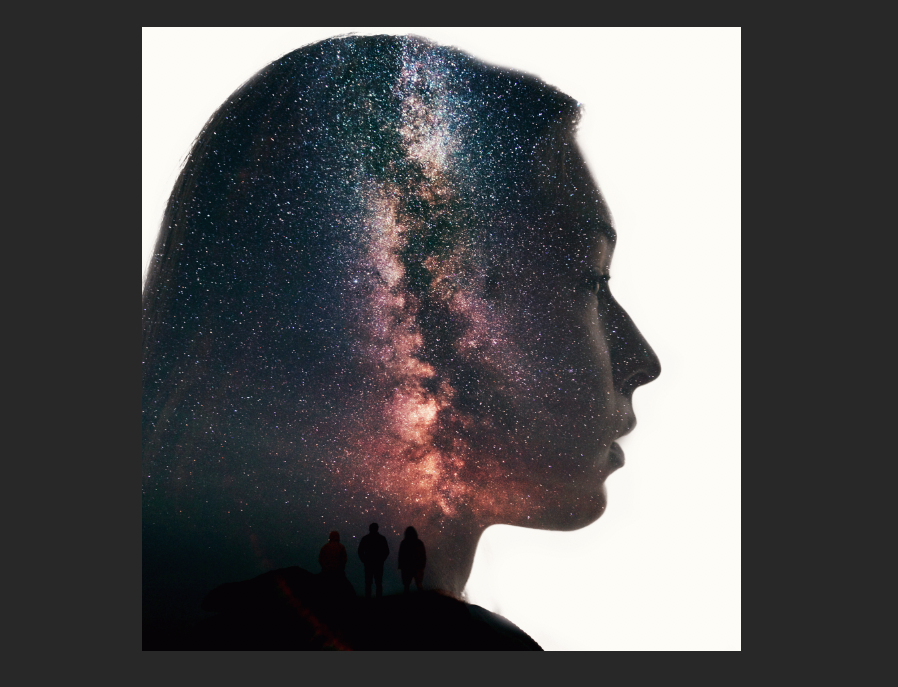
You’re almost there! This is the part where you make minor changes such as cropping, color correcting even more, or watermarking.
Congratulations! You’ve made your very own double exposure. Now you can add a new skill to your collection and further improve your portfolio. The more you practice with a variety of portraits, the easier this process will get. While double exposures may not become a consistent part of your day-to-day editing work, they’ll add an impressive spark to your portfolio, leading you to more creative opportunities and even more satisfied clients.
Keep up the great work!
Interested in creating this effect with a Photoshop action? MCP Action’s™ Double Exposure Photoshop Action is just what you need! See what it can do:
Now 50% off with promo code: doubleex50
[button url=’/product/double-exposure-photoshop-action/’ icon=’entypo-camera’]Click to Purchase[/button]

