Featured Products
Recently, one of my friends shared with me a picture on Facebook that was labeled “Taking a Panoramic Picture while Rolling Down a Hill”. It was of a gorgeous picture, supposedly taken with an iPhone while rolling down a hill. She “challenged” me to see if I could do it, or more specifically, if my husband could do it. I immediately accepted – but I wasn’t about to roll down a hill! I pulled out my laptop, fired up Photoshop and let the editing begin!
Step 1 – Take or Create a Panoramic Picture
For this tutorial, I’ll be creating a panoramic picture using an existing picture. Some elements you will want your picture to have are:
- Landscape – 4:3 aspect ratio
- Skyline – 1/2 or 1/3 of the picture should have sky, preferably with trees or buildings in the background

- Open your picture in Photoshop
- Select the Crop (C) tool
- In the tool preferences, check “Unconstrained”

- Drag the top and bottom handles of the bounding box until you have a panoramic picture, then press “enter”.

- The next step is key in making this a successful edit. You MUST have each end of the picture appear as if it’s continuous.
- Using the Marque (M) tool, draw a selection around either the left or the right side of the picture.

- Once you are happy with your selection, click “Command”/”Control” + “J”. This JUMPS your selection to a new layer.
- Click on the new layer. Using the Move (V) tool, click and drag the layer to the opposite end of the picture.
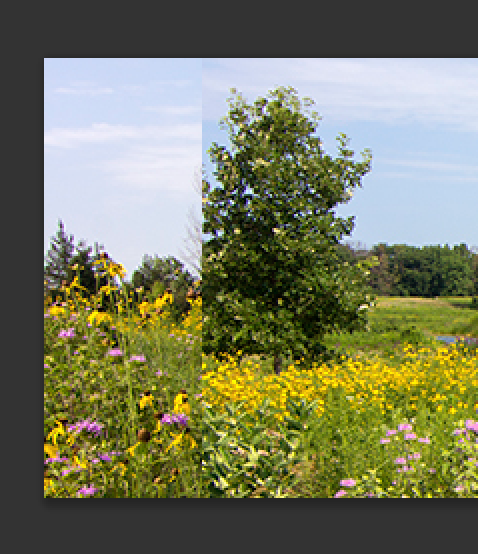
- Then go to Edit > Transform > Flip Horizontal. Your picture should look funky like mine does below.

- Select the Eraser (E) tool, and using a medium sized soft brush, erase the hard line, blending the two layers together.
- Once you are happy with your edit, go to the Layers Palette Menu and Merge the layers.

Step 2 – Wrapping your Image
Now the fun part begins!
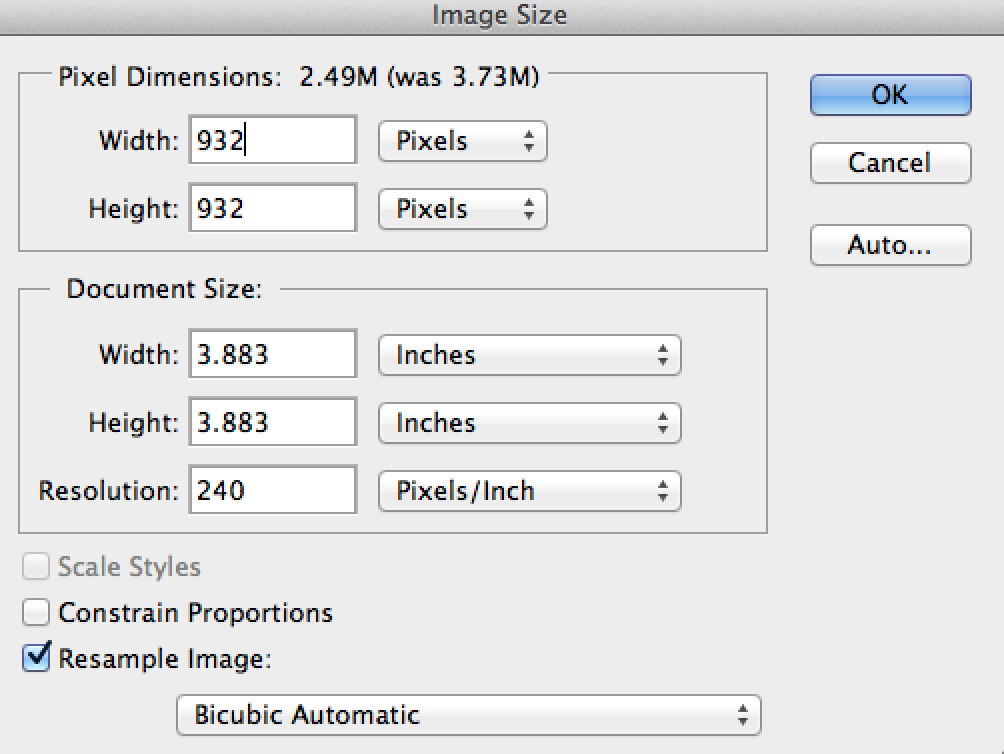
- Go to the Image menu > Image Size
- Uncheck “Constrain Proportions”
- Whatever the height of the image is, make that the width of the image as well, so you have a perfect square. (See below for an example)
- Click OK.

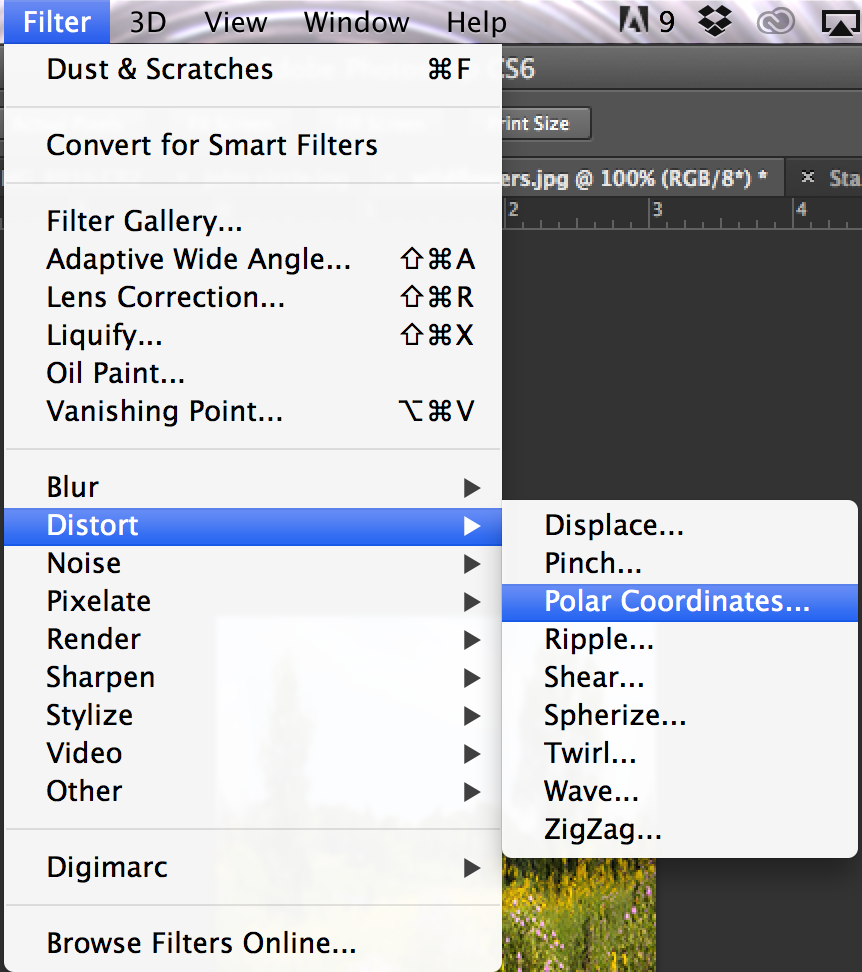
- Now go to the Filter menu > Distort > Polar Coordinates…

- Make sure “Rectangular to Polar” is checked
- Click OK.
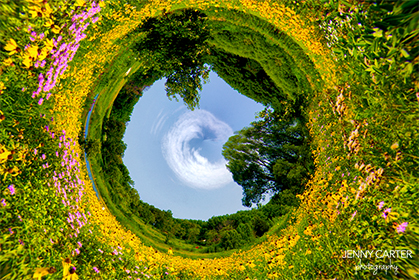
- You will now have a wrapped panoramic picture!
- Feel free to crop and edit with your favorite MCP Actions!

Jenny Carter is a portrait and landscape photographer based out of Dallas, Texas. You can find her on Facebook and view her work here.
No Comments
Leave a Comment
You must be logged in to post a comment.


Oh How fun. I knew how to do the polar coordainance but not how to blend the edges and make it all the same size and stuff. Thank you much for clearing up some of this for me.
Thank you for sharing the way to do your Rolling down the Hill photo. Maybe one of these days I’ll try to do my own Thank you againTerry R
This is neat and I’ve been playing with it, but I’m confused – your final image is not square, and the border/edges are much different than what I’m able to reproduce. You must have done a lot more than just “crop and edit with MCP actions” between running the polar coordinates filter and the final image? It would have been more clear if you showed your image after the filter and then any final effects you added.
I had the same issue. My picture ended up square and not rectangular.
Wow that is totally awesome! I’ve always wondered how easy this could be done in Photoshop. Now to find the perfect image for it 🙂 Thanks MCP