Featured Products
Equipment Used: Canon 5d Mark iii, 50mm 1.4L lens, and 100mm 2.8 lens
Light: Natural
Computer software: Adobe Photoshop CS6
Here’s a fun way to manipulate your photos — it’s easy and it works great this Easter or for other creative fantasy composites too!
I used my Canon 5d Mark iii, shot in RAW with 50mm 1.4L and 100mm 2.8 lenses. I photographed both the eggs and my girls on Bone Seamless paper. This will make post processing a lot easier. I’ll explain more on this later.
- I started by carefully cracking open a few eggs. In hindsight, I wish I would have cracked the one for my oldest up higher so it looked like she fit in the egg better. So keep that in mind when you do this. I washed and dried out the eggs.
- To keep the eggs sitting up, I used a bit of scotch tape at the bottom. Attach the tape to the egg toward the back of the bottom of the egg. This will ensure you don’t see the tape in the picture.
- I took several pictures of the eggs. I wasn’t sure if I would want to do the image vertically or horizontally so I took pictures both ways so I could decide during post processing.
This is the image I decided to work with:
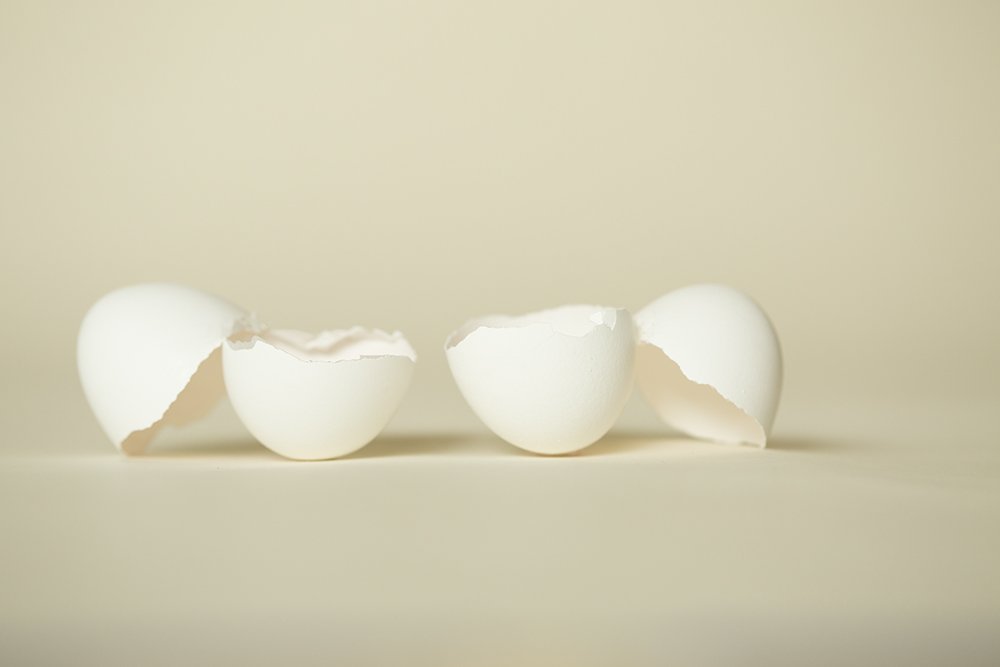
Shot at 1/100 sec, f 3.5, 400 ISO, 100mm 2.8 lens
- After I photographed the eggs (which got some weird looks from family members), I started with photographing my oldest. At the time, I wasn’t sure which egg she was going to go in or how I wanted her to sit so I took several pictures. I ended up with this image as my final one (which, ironically, I didn’t take for the egg… I just wanted a close up of her for her memory book):
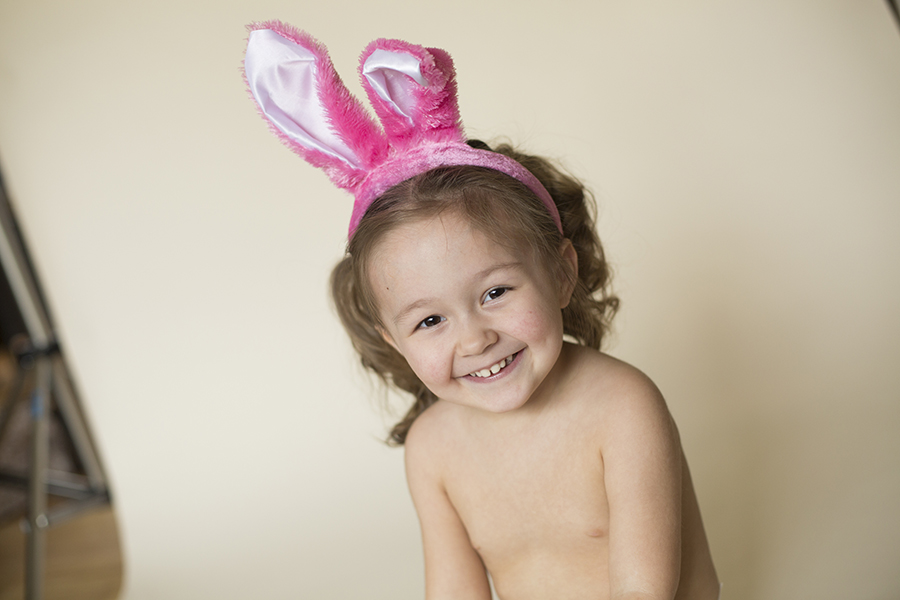
Shot at 1/200 sec, f 2.5, 400 ISO, 50mm 1.4L lens
- Next up was my youngest daughter. She is just starting to sit up unassisted so I wasn’t sure how this was going to work. I did have my husband as a spotter (SAFETY FIRST) but was prepared to have him hold her at the hips since you wouldn’t see that with her in the egg anyway. She sat up like a champ and this is the image I decided to work with:
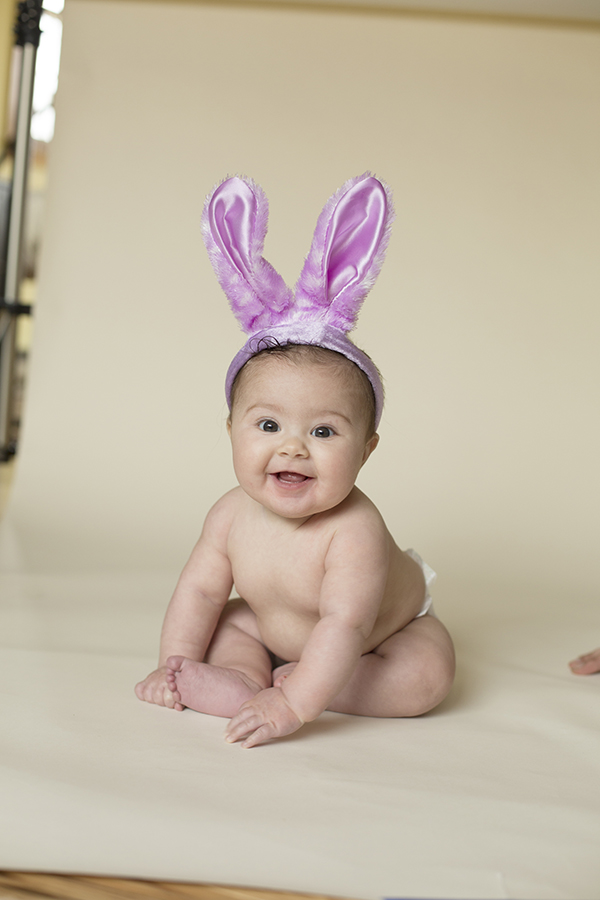
Shot at 1/160, sec f 3.2, 400 ISO, 50mm 1.4L lens
(Note my husband sitting right next to her. No photo is more important than your child or client’s safety!)
- I uploaded the images to my computer and started sorting through the egg pictures. After I found the perfect one, I did some minor color and brightness adjustments in ACR. My white balance was slightly off and I was shooting too yellow. (Whoops!)
- I opened up my image in Photoshop and started by cropping/centering the eggs and I decided I wanted to extend my backdrop. I did this by double clicking on the background layer in your layers palette. This box will appear:

- Click “OK”.
- I sized the layer down until I was happy. I did this by clicking shift and dragging the corner of the image. (Make sure you use your shift key so you maintain the aspect ratio — we don’t want skinny eggs!) I ended up with this:
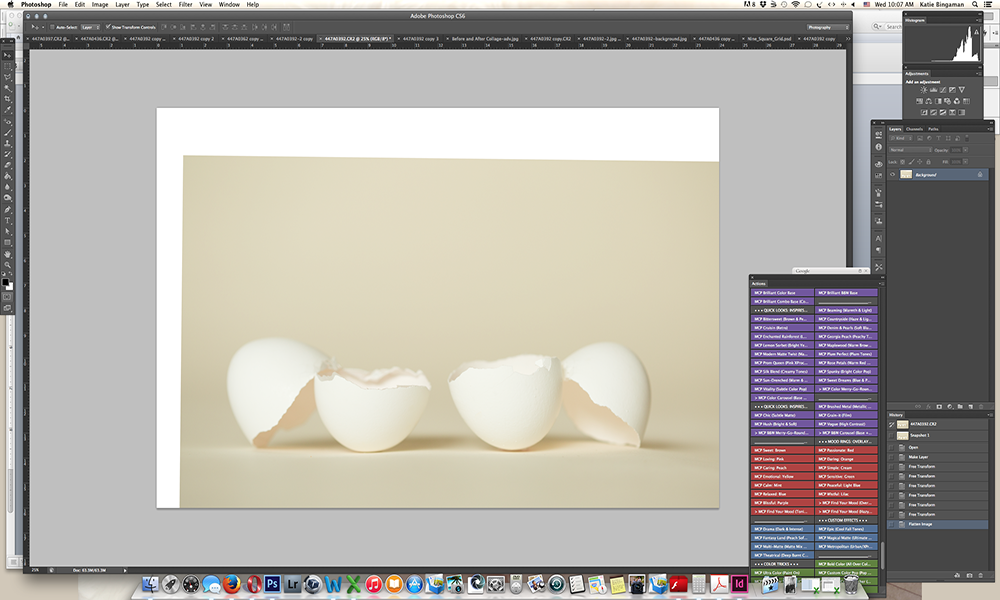
- I took the eyedropper tool and sampled the background color.
- Next, I made a new layer by clicking the layer button in the layers palette:

- When I was filling in the blank areas, I had to take several samples with the eyedropper tool and used several different opacities, blending until I was happy with this final background image:
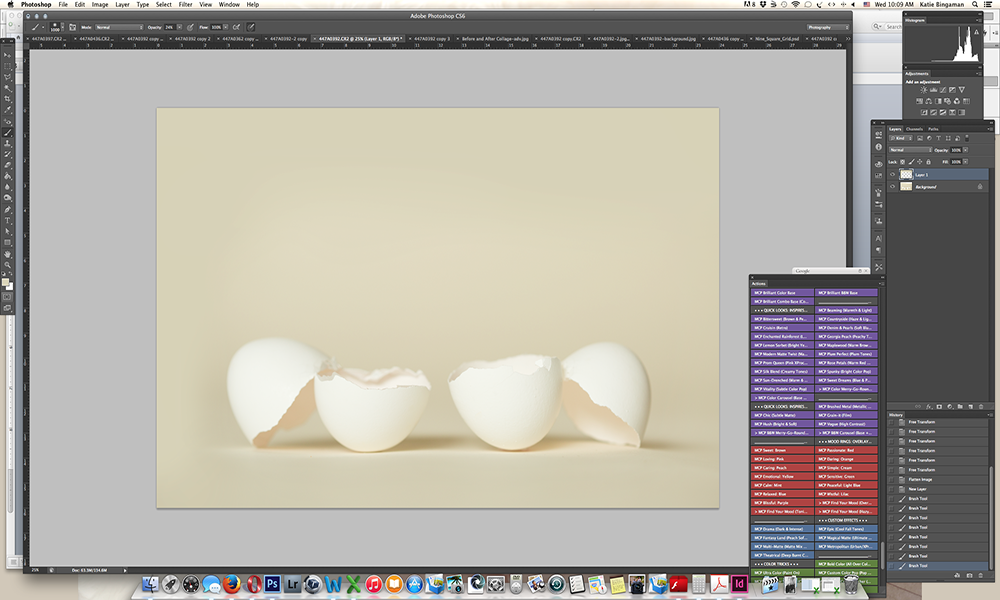
- I flattened my layers by going to “Layer” then “Flatten Image”.
- Next, I opened up the image of my oldest daughter. Using the move tool, I dragged the image of my daughter to the image of the eggs. I resized the image of my daughter so she fit into the egg by pressing shift while dragging the corner of the image. I also rotated the image a bit and was left with this:
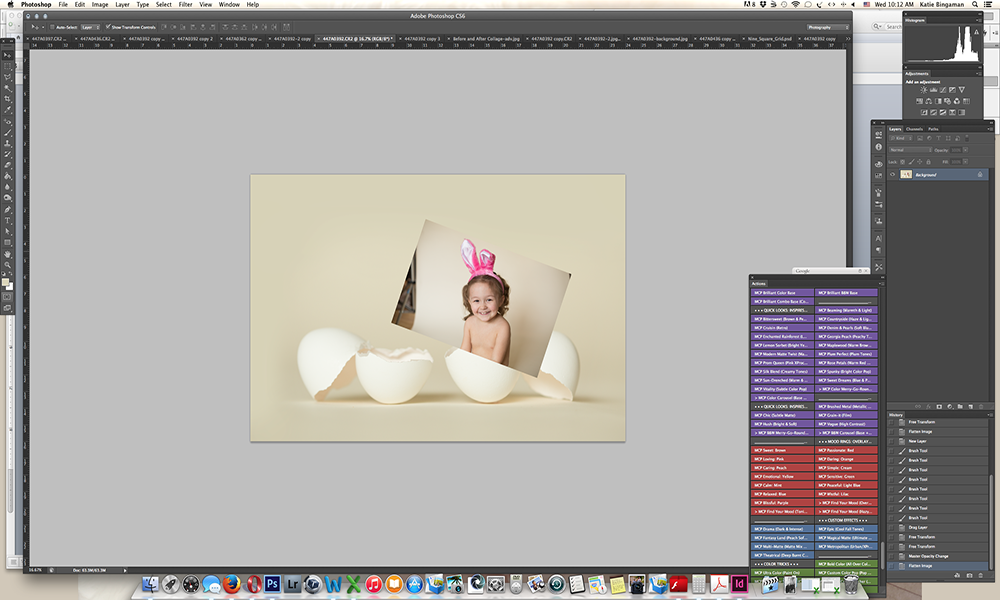
(Tip: When sizing your images down, change your image opacity to about 50%. This will make it easier to see what they would look like in the egg. When you’re happy with the size, make sure you change the opacity back up to 100%.)
Here comes the super fun stuff!!!
- I double clicked on my background layer in the layers palette again and clicked “OK”. (This unlocked the background layer for the next step.) I took the egg layer and dragged it on top of the layer of my daughter in the layers palette.
- Next, I made a layer mask by click the layer mask icon in the layers palette:

- I changed the opacity of the background layer to about 40%. I took my black brush at 100% and started painting over my daughter.
(Tip: to make this super simple, push the “ \” key on your keyboard. Anywhere you paint will turn red.)
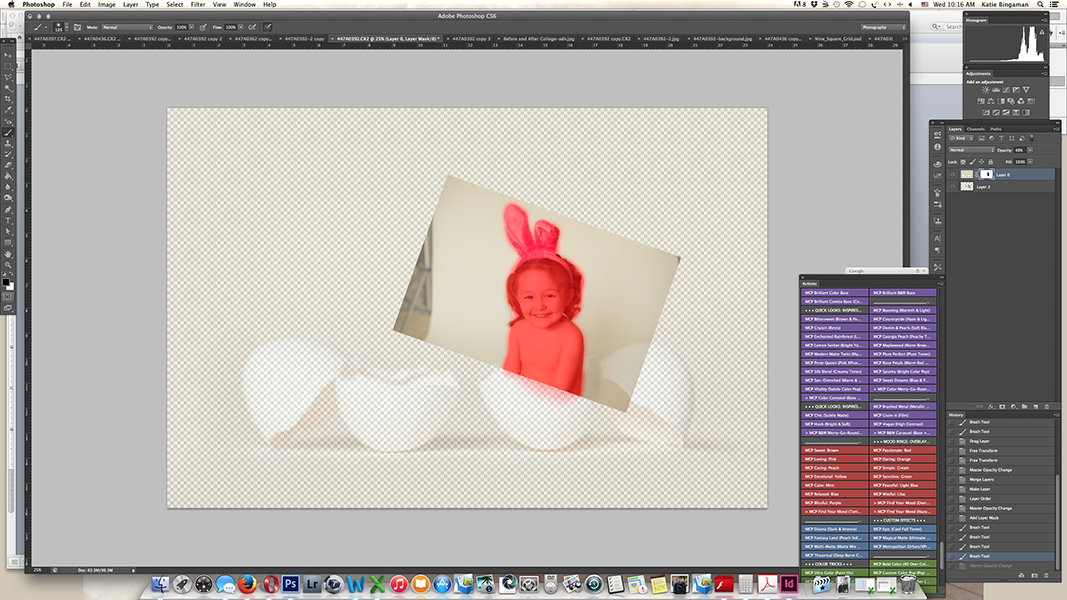
- I brought the opacity back up to 100%, clicked the “ \” button again. I ended up with this image:

- I went back and forth between the white and black brush to clean up the image so it looked like this:
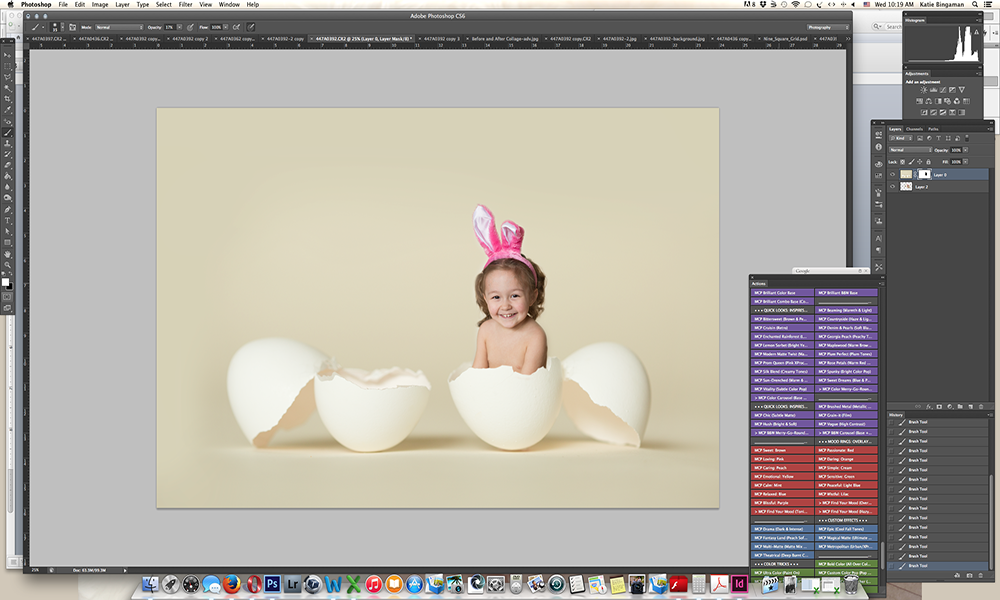
(Tip: Because I shot both the eggs and my kids on the same backdrop, I didn’t have to be as precise when working in the layer mask. If you shoot with a different backdrop, you’ll need to be more precise with your edits and if you are shooting on a completely different color, you may need to deal with some color casting on the egg and/or kids.)
- Once I was happy with the image, I took a snap shot of the image just in case I messed anything up and needed to come back to this specific point in the image:

- I flattened the image by going to “Layer” and “Flatten Image”.
- For my youngest daughter, I followed the same steps as above. When sizing the image down, I made her smaller so it was more believable that she was in the egg sitting beside her older sister. (Obviously my 5 month old is not the same size as my 3 year old.)
- After I was happy with my youngest in her egg, I took another snap shot of the image, and flattened the image.
- At this point you’re almost done. I made some final adjustments in terms of cropping and I did need to blend my backdrop a bit more.
- I wanted to process the image just a bit so I ran Brilliant Base from MCP’s Inspire Action Set.
And TA-DA! This really adorable image of my cuties!
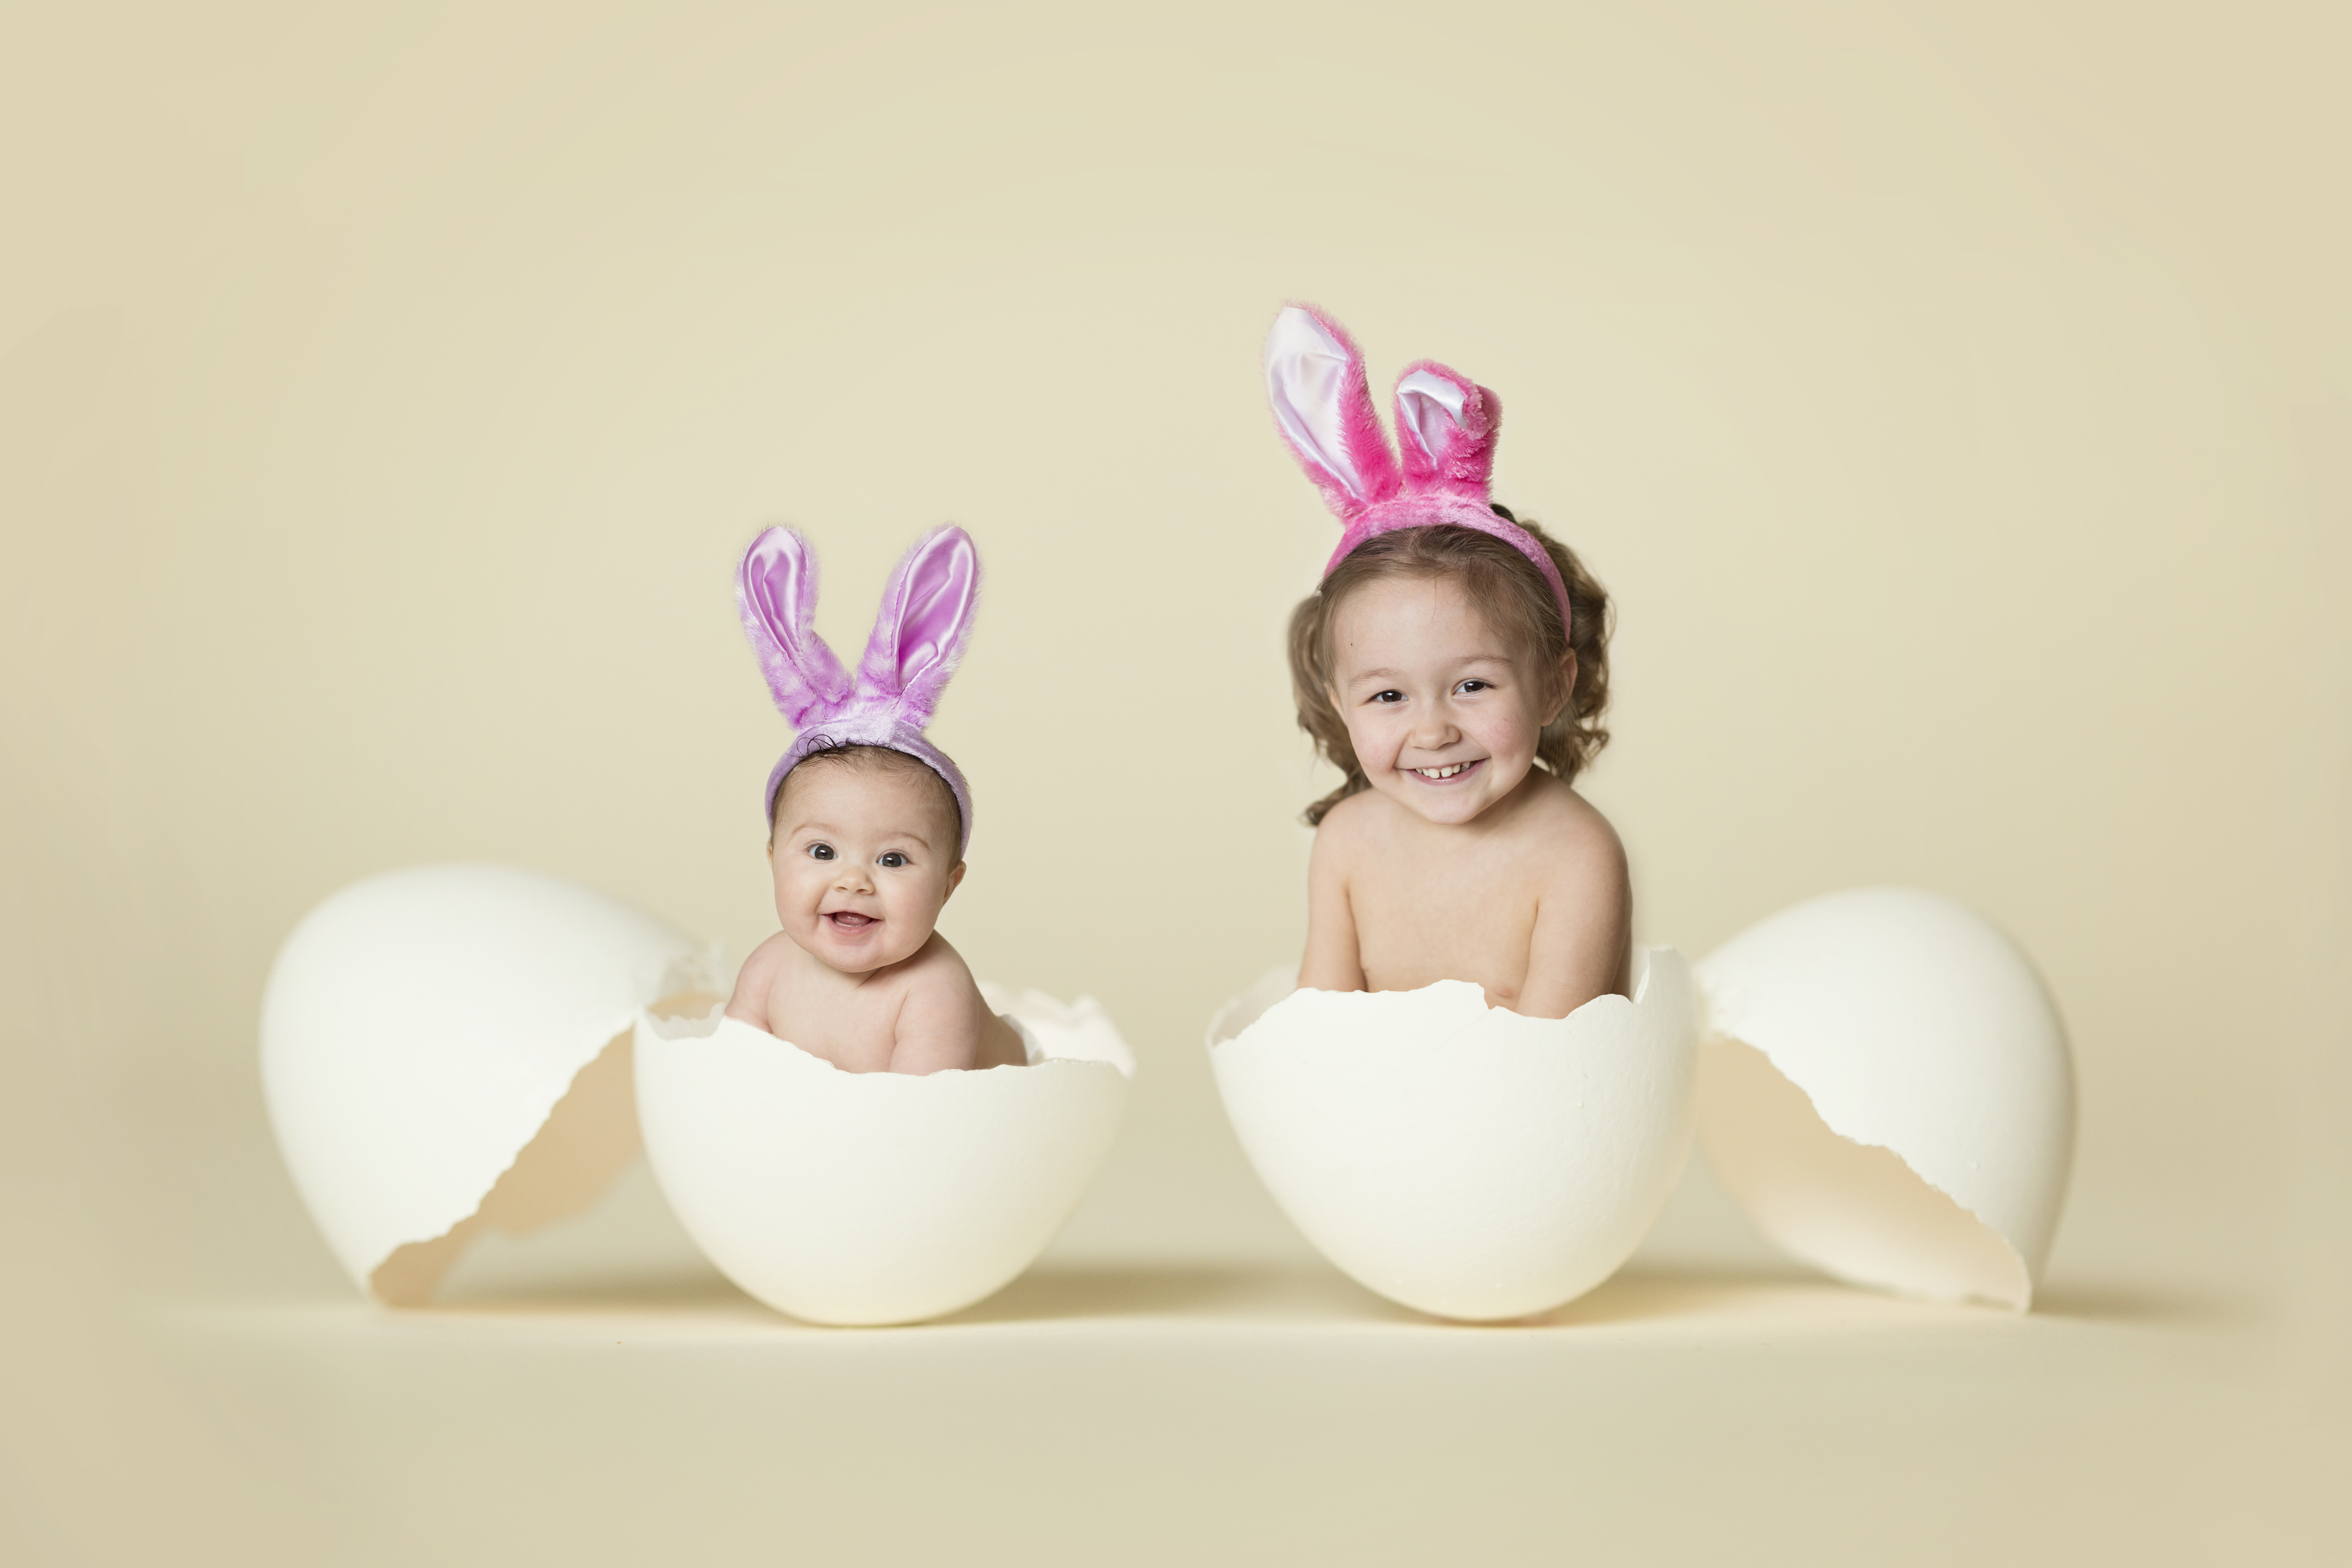
Now go out there and get creative!!!
After working for two large photography companies over five years, in 2012 I was encouraged by my husband to stay home with my newborn daughter and finally start my photography business. I am an on-location, natural light photographer, specializing in children and family portraits. When I’m not photographing clients and their families, I am photographing my two children Genesis, aka “Woogie” and Olivia, aka “Oleeda”. And sometimes, that involves “putting them in eggs”… If you’d like to see more of my work, visit my website www.katiebingamanphotography.com or my facebook page www.facebook.com/photobykatie.
No Comments
Leave a Comment
You must be logged in to post a comment.




I’m primarily an event photograher and have a few baby portraits comming up this summer, this really helped jar the creativity limits in my brain. Thanks for posting this, it helped me to remember, with photoshop we can “go nuts”! Have a blessed day!