Double Exposure Photoshop Action
$58.00
Easily combine two images into one and create a truly unique photo using the Double Exposure Photoshop Action. Get fully layered and editable results that you can customize to transform your work into something spectacular. Whether you’re new to Photoshop or a seasoned user, the Double Exposure Photoshop Action will give you the professional results you want in just a few simple steps, clearly outlined in the product video tutorial. Once you brush over your subject and play the action, all you need to do is choose the second photo you want to work with and add any finish touches you like!
Compatible With: Photoshop Creative Cloud, Photoshop CS2-CS6
Description
Please Read Before Purchasing: MCP Double Exposure Photoshop Action will work with the latest versions of Photoshop as well as Photoshop CS2-CS6. Earlier versions of Photoshop and Photoshop Elements will not work so please make sure that you have the required software before purchasing. You will need access to the English version for full compatibility.
We make every attempt to ensure that our products work in future versions of Photoshop, but due to possible changes Adobe may implement in future updates, we cannot guarantee future compatibility.
Using the Double Exposure Photoshop Action:
With the Double Exposure Photoshop Action set, create amazing double exposure effects for your photo with no work at all! The action is so easy anyone can use it … even Photoshop beginners. Just brush over your subject and play the double exposure photoshop action. Choose a second image when prompted and let the action do the work. It’s really that simple!
To maximize the results of your double exposure effect, the action creates four different options for you to choose from. All you need to do is decide which one you like the most!
The set also includes 90+ additional actions that you can use to further enhance your images. They are arranged in 7 groups:
- Retouching Actions: reduce noise, smooth details
- Color Actions: auto color, black & white, render all color looks…70 unique color looks!
- Lighting Actions: auto tone, boost highlights, boost shadows, boost midtones, drop highlights, drop shadows, drop midtones
- Contrast Actions: soft contrast, hard contrast, auto contrast
- Saturation Actions: vibrance/saturation, saturation
- Sharpening Actions: small details, medium details, large details
- Vignette Actions: add black vignette, add white vignette
Watch Marko show just how easy it is to use the Double Exposure Photoshop Action:
How it works? It’s super simple!
Perfect for both Photoshop beginners and pros, this action gives you professional results fast. Just follow the easy instructions in the video tutorial to create a unique double exposure image.
How it’s done:
1) Go to Layer > New > Layer to create a new layer and name it ‘brush.’ While that layer is selected, use a Brush Tool (B) to brush over your subject (color choice doesn’t matter).
2) Select the Double Exposure action and click Play.
It’s simple as that!

The action will stop once and ask you to choose the second photo you want to combine with first one. Here’s the photo we’ve picked for this example:
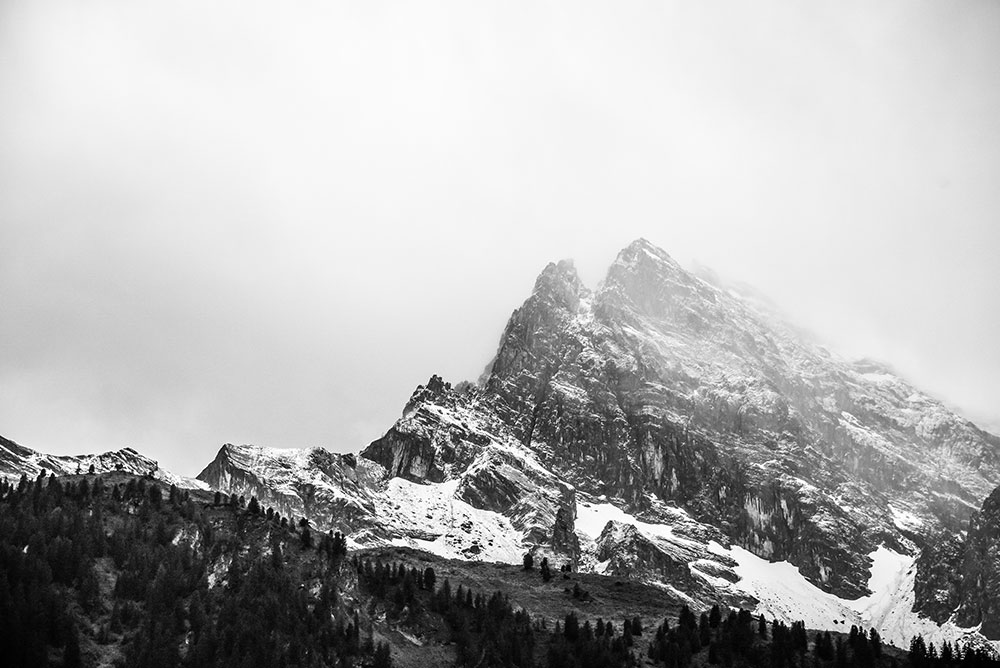
And below is the amazing photo effect we made in just a few seconds:
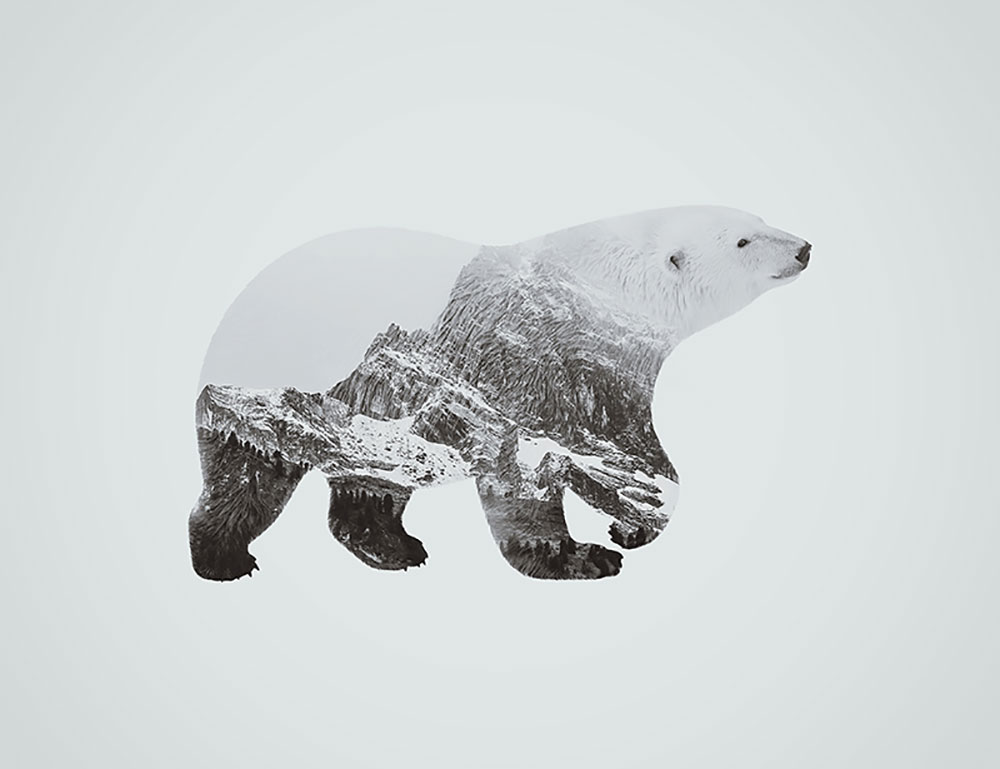
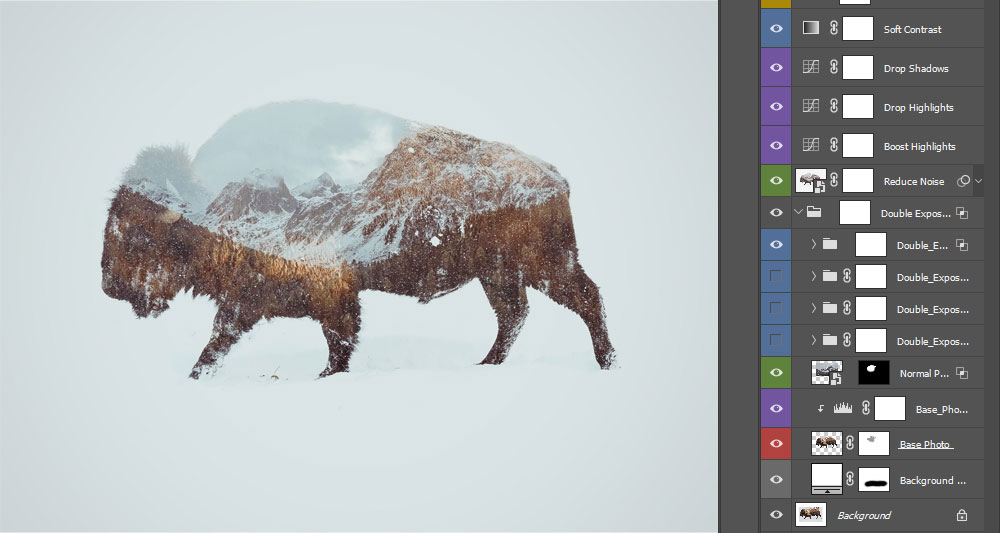
As we mentioned before, the action creates 4 different double exposure effects. To find out which one works best for your photo combination, all you have to do is to turn on one of the double exposure folders and see how it looks. If it doesn’t work well, simply turn it off and turn on a second folder. In this example we used Double Exposure_3. Here’s a part of the layers panel which demonstrates how the 4 different double exposure effects are displayed.
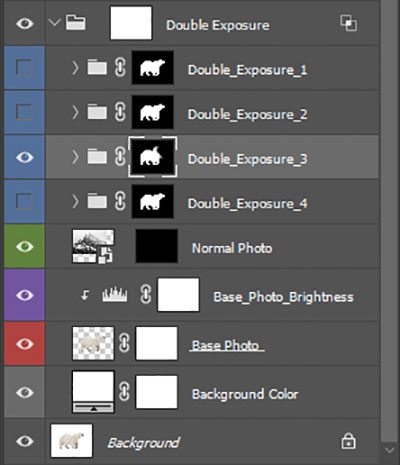
Double Exposure 3 works by blending the second photo with a certain range of highlights of the first photo (range changing is demonstrated in video tutorial). In the example above, we also used additional actions from this set to make some final adjustments (more on that in next example).
Another example:
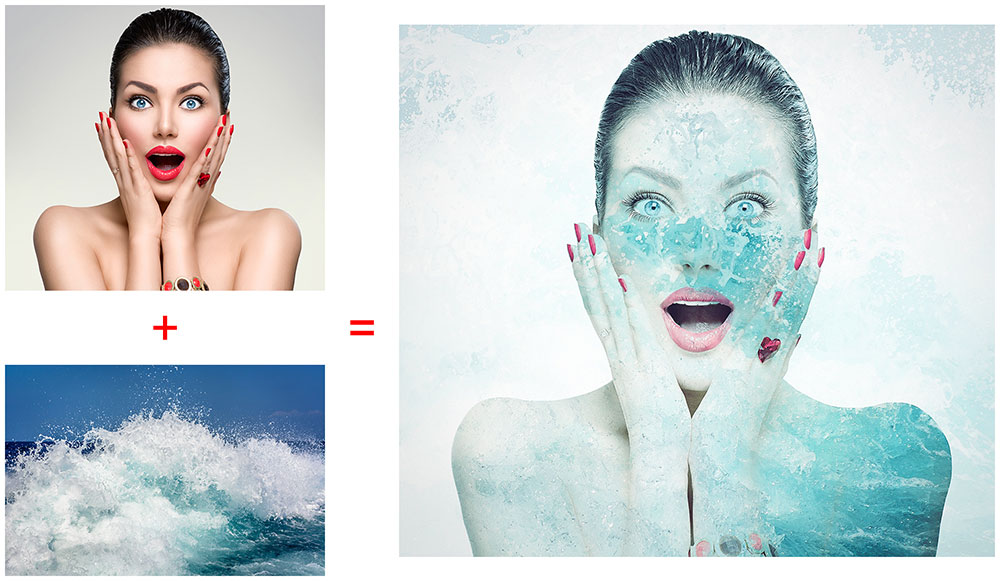
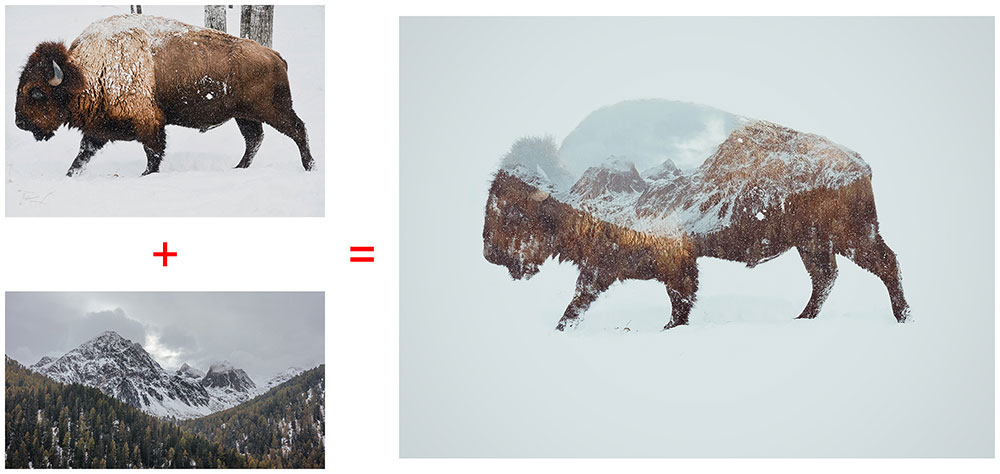
Let’s just quickly go through to process once more. The top left photo on the image below is the first photo we’ve chosen for our double exposure effect. After we’ve checked all necessary things (mentioned in both the Readme file and video tutorial), we created a new layer by going to Layer > New > Layer and named it ‘brush‘. Then while the brush layer is selected, we brush over the subject. Then we selected the Double Exposure action and clicked Play. The action asked us to choose a second photo, which is the bottom left photo on the image below. After that, we just pressed the Play button again and the photo on the right shows the cool effect we got.
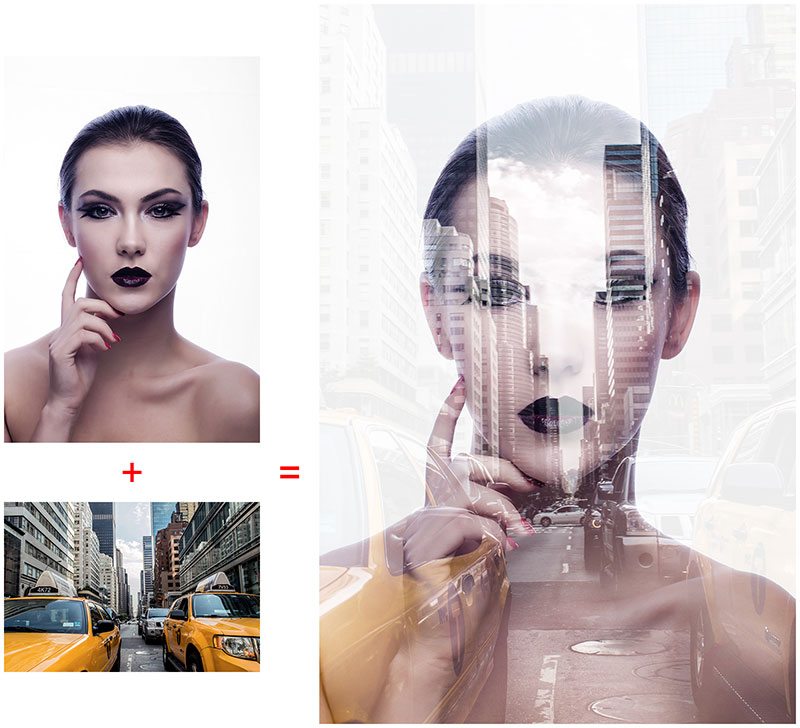
In this example we used Double Exposure_2. Here’s a part of the layers panel which demonstrates how Double Exposure_2 is displayed.
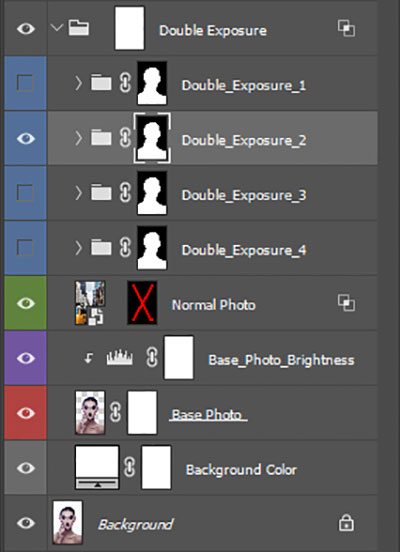
Double Exposure_2 works by blending a certain range of shadows from the second photo with first photo, and it will also make all grey shades between pure black and pure white in the second photo lighter. After you finish customizing the design, you may want to add some final touches by adjusting color, contrast, and other options quickly by utilizing the additional actions offered in this set. Just select the action that you want to apply, and click Play.
Here are the other actions from the Double Exposure set we’ve selected and played:
- CL_46 and CL_52
- Boost Highlights
- Drop Highlights
- Soft Contrast
- Saturation
- Medium Sharpening
And here’s what we got:
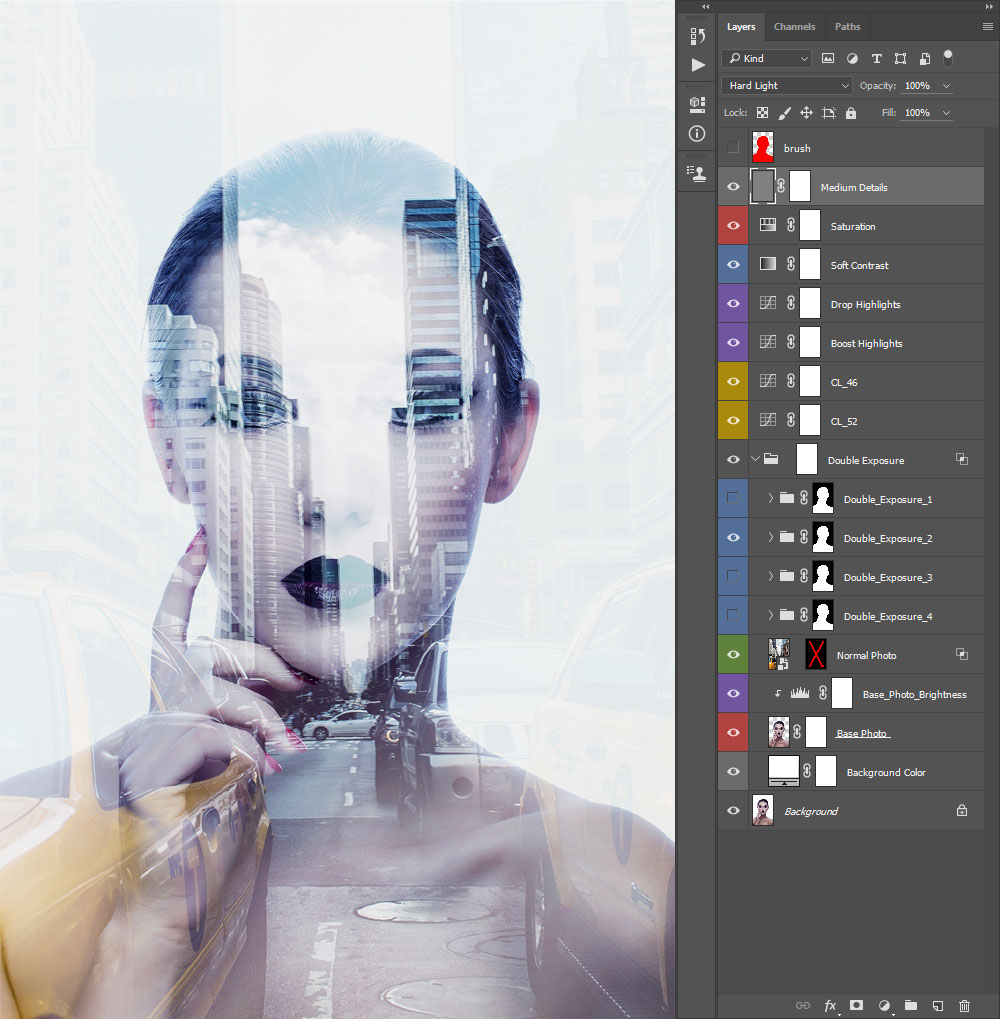
Each layer created by the Double Exposure Photoshop Action is well named, organized, grouped and color coded so you have a clean working space in case you want to customize layers in any way.
Another example:
In this example we used Double Exposure_4, which works by blending the second photo with a certain range of shadows from the first photo.
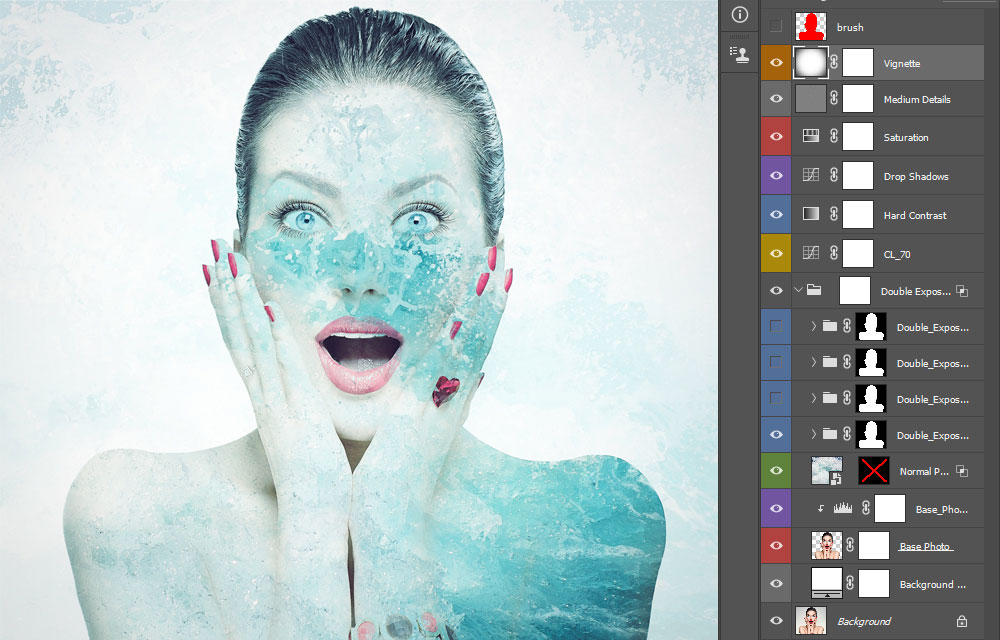
Another example:
In this example we used Double Exposure_1, which works by blending a certain range of shadows from the second photo with first photo.
Use can also use the adjustments actions without the Double Exposure Action!
All the actions in this set are made to work independently. So if you don’t want to use double exposure photoshop action, but instead just want to add color, brightness, contrast or make other corrections, you can easily use the adjustment actions from this set. After you open your photo and check all necessary things (mentioned in both the readme file and video tutorial), you can just select any of the adjustment actions and click Play. You don’t have to create a brush layer and brush over your photo in this case.
Here are some nice effects we’ve added in just a few seconds:

Additional information
| Your Software Version | |
|---|---|
| Subject | Architecture, Landscape, Men, Model, Nature / Wildlife, Portraits, Women |
You must be logged in to post a review.




Reviews
There are no reviews yet.