Featured Products
How to Eliminate Background Distractions & Objects in Photoshop
There’s a lot to pay attention to during a shoot, no matter what kind of shoot it is. As photographers, we strive to capture the image perfectly in camera. Ideally, we use Photoshop to enhance the already fabulous, unique, decisive moment we have captured, because every time we push that shutter release, that’s what we get, right? At least, that’s what we want our clients to believe. So what happens when we get that super awesome amazing shot, and there’s a super ugly not so amazing distraction in the background? Panic. Frustration. And if you’re like me, an eternal search for a rewind button in life. However, none of those things will help you. And that’s where Photoshop comes in.
I asked Jodi’s readers on her Facebook Fan Page to submit images with distracting things in the background of an otherwise stellar shot. Thank you to everyone who sent me pictures – it was a tough decision! I chose Jen Parker (www.jenparkerphotography.com), who graciously submitted her image for me to work on, and granted us permission for all of you to download. This way, you can work through my steps on the same image, and learn the concepts to apply to your own work. Keep in mind, there are about twelve different ways to solve one problem with Photoshop; this is just one of the techniques I use.
Click the small image above to be taken to a larger image. If you then click on it and save it to your desktop, you can practice this technique.
For small distractions, the clone tool usually does the job. But when it is a large area of the image, the clone tool often results in unintentional patterns, and general funkiness. This technique does take some time and patience, but always works for me. It is heavily reliant on the often-overlooked lasso tool (note – I am using CS3).
1. Duplicate the background layer (Control OR Command + j with the background layer selected).
2. Press “L” for the lasso tool, or select it from the toolbar. Make sure you are on the first option of the tool, the “Lasso Tool”, not the “Polygonal” or “Magnetic” lasso tool.
3. The top bar displays different options to refine the use of the tool. Generally, I feather the tool somewhere between 20 and 40 pixels, depending on the size of the area you are trying to cover.
4. Using the lasso tool, select an area of the image that looks similar in color and content to what would be in the area, if it weren’t for that person who walked in, or whatever it may be. In this case, I selected pavement to cover the legs of the person in the background (see Image A).
5. Use the keyboard shortcut “Control or Command + J” – this takes what you have selected and places it on it’s own layer.
6. Hit “v” for the move tool. Place it over the area you wish to cover. Don’t worry that it is also overlapping an area you don’t want covered – we will address this a little later on.
7. You can use copy that layer again and use it to cover another area. To avoid repeating patterns, I will often increase the size of the selection, or rotate it, using free transform. Make sure you are feathering the selections enough so that the edges blend with areas around it when you relocate the selection.
8. After I have completely covered the distractions, I end up with something that looks rather silly – see Image B. I then select all the layers above the background layer to put them into a group. This is done by holding down Control or Command, and clicking on those layers. Once they are selected, I hit “Control or Command + g”, which puts those layers into a neat little folder called a group. We can now add a layer mask to the whole group, and it will affect all 3 of those layers.

9. Add a layer mask by hitting the square button with a white circle in it at the bottom of your layers palette.
10. Now, you want to cover up the areas of the image you did not want to affect when removing distractions. Make sure you are on the brush tool by hitting “b”, followed by “d”, which sets your swatches to black and white. Black should be on the top of the two squares – if it is not, hit “x” to do so.
11. At this point, you need to decide your brush settings. For this technique, I always have the brush opacity at 100%, which is found at the top settings bar when the brush is selected. I lower the opacity of the layer, just so that I can see where I want to paint back my image, usually to about 40%. I zoom in to about 100% (Control + Alt + 0 OR Command + option + 0). Right clicking, I change the brushes hardness to about 50%, depending on how crisp I want the edge of the area I am bringing back to look.
12. Paint away! This part takes the most time and patience, but is usually worth it in the end. When you think you have brought back everything you wanted to, increase the layers opacity to 100%, and toggle the later eyeball on and off.
13. Step back and admire your work!
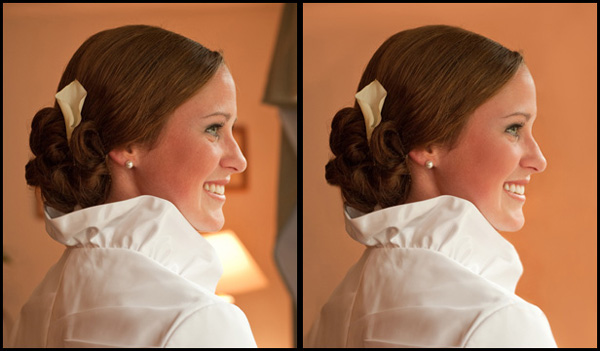
Below is some of my own work where I have used this technique. If you have any questions about this image, or one of you own, feel free to shoot me an e-mail at [email protected].
Currently located in Boston, I work full time as a retoucher, and part time growing my own photography business. Photoshop is my strength, and I find that teaching other photographers gives me great satisfaction, and as a teacher, you are also learning. For more about my work and myself, you visit my blog at www.kristenschueler.blogspot.com, my website www.kristenschueler.com, or “like” me on Facebook! Just search “Kristen Schueler Photography”. Happy Photoshopping!
No Comments
Leave a Comment
You must be logged in to post a comment.




















Great article!
Awesome!! What a life saver…thank you so much!! 😉
Oooh, that worked like a charm! Thank you for that awesome tutorial. I’m off now to practice some more on my own pictures…
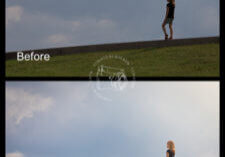
These are great. 🙂 I love seeing the power of Photoshop. For my daughter’s 3-month photos, I kept my hubby close by in case she fell and just edited him out. I attached a before-after to this comment.
This is a really great post! Thanks for sharing the steps and the examples, too!!!
I never knew about the “group” function… I guess that allows you to work with multiple layers without merging / compressing them? Very cool.I love when techniques are demystified so that I can see that it’s not magic, but it still takes hard work. Thank you!
Thanks for this! So much easier than cloning!
Wow, what a great tutorial. I can not wait to try this out!!! Thank you for posting it!
Incredible!! I can’t wait to go home and playaround with what I just learned 🙂
Great tutorial! It’s so good to see alternatives being offered to cloning. I would like to add that even when cloning is the solution to an issue, it’s still best to do it on a separate layer, and mask it.
Thank you so much! I’ve been decent with photoshop, but this single blog post was so incredibly valuable for me. Really appreciate this.
Used this today for the first time and it made me so happy to know how to do this so efficiently! Thanks!!!
This article illustrates how you can make THE difference in a photograph where it was impossible to eliminate unnecessary background elements when taking the shot…
Thanks! I don’t think I’ve ever really used the lasso tool, and if I did I certainly didn’t know how to use it.
This is an awesome tutorial! Thank you so much for sharing!
Thank you. I always love seeing the before and after. Great help, much appreciated. I wish I could repeat this with my photos. Thank you that inspiring me.
I think lasso tool works amazingly to remove the distractions from an image. You have found out the tiny distractions in the photos which is commendable. I really found this content very useful. Thanks a lot for sharing this post.