Featured Products

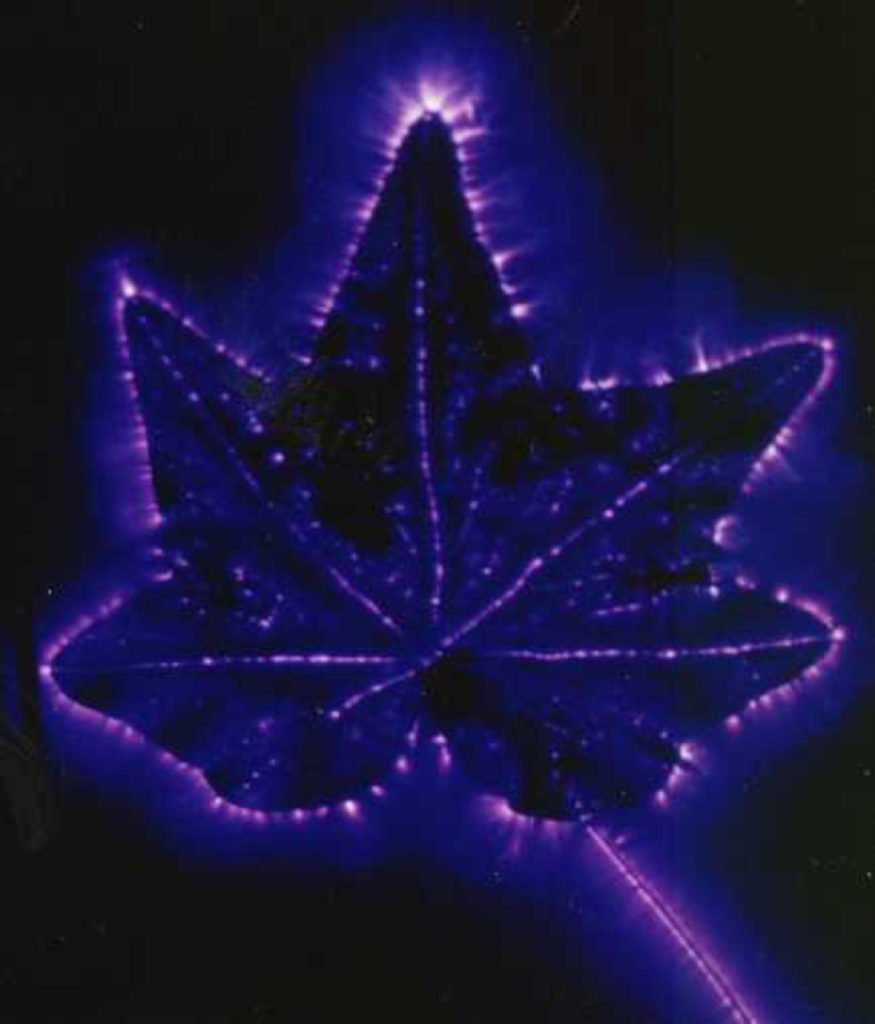
Kirlian technique has been a mystery for a long time. Some people still believe that magic forces or auras are shown in Kirlian photos. Despite this fact, high voltage is responsible for the whole process. This technique is not recommended for beginners because it involves high voltage and special equipment.
In this article, I will describe how I managed to take Kirlian photos and what steps of the process I’ve used. You should not engage in trying the technique if you don’t have the necessary knowledge, skills, and expertise.
It is important to gather all of your equipment before trying out this method. So, I did. Also, I tested them all to see if they work normally. In this article, I am going to show you more about the Kirlian photography technique. This is a step-by-step guide that is going to help you understand this method through my experiment.
More About Kirlian Photography
This technique was developed by Semyon Kirlian in 1939. In the beginning, it was believed that it can show the real auras of the photographed objects. The logical reason for this technique is the electrical coronal discharge that happens when the high-voltage current enters the subject that is placed on a photographic plate.
Photography experts use different objects for this type of photography. From leaves to apples, they just pick the one they want to test first. Another important thing they know which is essential for such photography is that they should pick a moisturized subject to have a colorful wave that surrounds it. Also, they buy the equipment online or build it themselves.
Steps for Doing Kirlian Photography
Step 1: I Prepared the Equipment
To test and learn the Kirlian photography technique, I needed to set the equipment in place. I purchased it online, so I just read the instruction in the manual. Those who make the equipment themselves clean it and assemble it. I needed to have the discharge plate or a photographic plate, a high-voltage source, the object I wanted to shoot, a digital camera with long exposure (more than 10 seconds). Some use a photographic plate, so they don’t need a camera. However, those who use a camera might also need a small tripod to keep the camera still while taking the picture. Also, this avoids contact with a high voltage source.
Step 2: I Set up the Space
Then I needed to find a place in the room where I had access to the light. I needed to turn it on and off before and after taking the photos. This technique could only be made in a dark room. Anyone who tries this should never let the equipment alone, so they should find a spot where they are near the equipment and the light.
Step 3: I Got Careful
I needed to be extra careful when I decided to test out this technique. It was important not to touch the equipment while taking the photo and a few minutes after disconnecting the high-voltage source. I made sure to keep a small distance from the equipment while shooting the photos because the sound and the sparks can be pretty scary at first. I later got used to them, so they got lighter.
Step 4: Preparing the Discharge Plate
I needed to clean and prepare the discharge plate before connecting it to the high-voltage source. After cleaning it with a wet cloth, I made sure to remove all the moisture and dirt with a dry cloth. Also, this was the time I put the object on the plate and use tape to stick it. Then, I’ve turned the plate upside down so that the object was looking downwards.
Step 5: Taking the Photos
Now we finally got to the interesting part. After I set the equipment and placed the subject, I connected the high voltage source to the discharge plate. Then I needed to turn the light off while taking the photos to capture all the colorful waves that surround the subject. I took the photo after the high-voltage reached the discharge plate or used the photographic plate.
There was also the possibility to ask somebody to help me turn the light on and off. After I finished taking the photos, I needed to turn the light on and disconnect the high-voltage source. I made sure not to touch the discharge plate or the high-voltage source – this is essential, and I always check this. I could have taken as many photos as I liked, and I did. Some photographers repeat the experiment if photos are unclear. However, I was lucky.
This is an interesting technique that is going to amaze many photographers. One thing anyone should take into consideration is the high-voltage source. Once one gets used to the equipment and the technique they can try taking photos with different objects to see which one they like best. This method allows photographers to get creative while remembering that being careful is a task that follows them every step of the process.
Disclaimer: This article represents only the author’s point of view. Because this technique implies high-voltage, MCPactions.com recommends you to be very careful, especially if you are a beginner photographer.


