Featured Products
-
Essential Photoshop Actions
Makeup Toolkit Premium Photoshop Action
Original price was: $79.00.$57.00Current price is: $57.00. -
Essential Photoshop Actions
Fusion™ Photoshop Actions
Original price was: $79.99.$58.00Current price is: $58.00. -
Essential Photoshop Actions
Bag of Tricks™ Photoshop Actions Set
Original price was: $69.99.$51.00Current price is: $51.00. -
Essential Photoshop Actions
Newborn Necessities™ Newborn Baby Editing Photoshop Actions Set
Original price was: $39.99.$29.00Current price is: $29.00. -
Essential Photoshop Actions
All in the Details™ Photoshop Actions Set
Original price was: $69.99.$51.00Current price is: $51.00. -
Essential Photoshop Actions
Complete Workflow™ Photoshop Actions Set
Original price was: $49.99.$36.00Current price is: $36.00. -
Essential Photoshop Actions
Inspire™ Photoshop Actions
Original price was: $99.99.$72.00Current price is: $72.00. -
Essential Photoshop Actions
Portrait Suite Frequency Separation Photoshop Action
Original price was: $63.99.$47.00Current price is: $47.00.
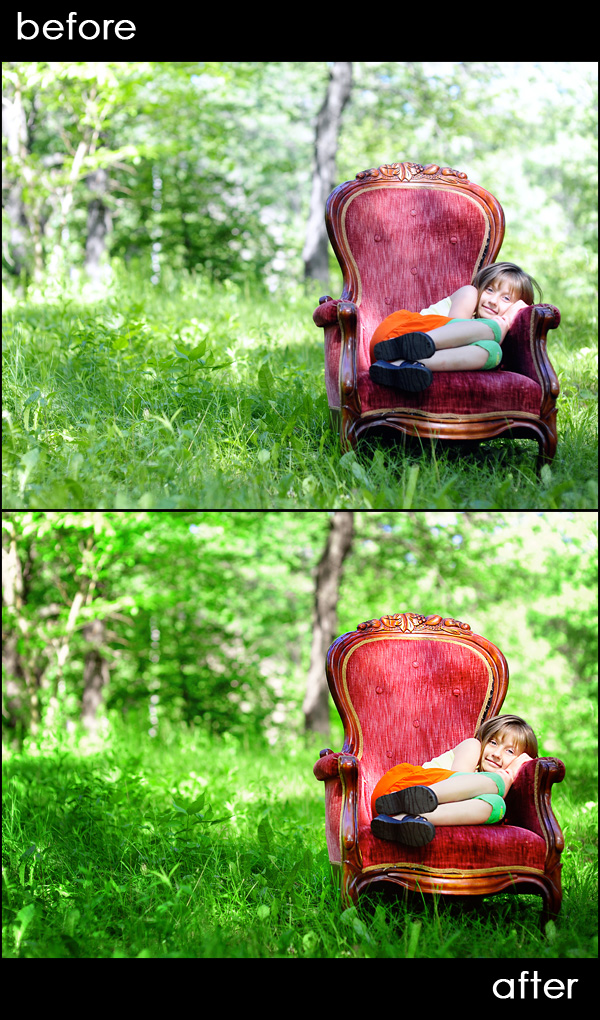
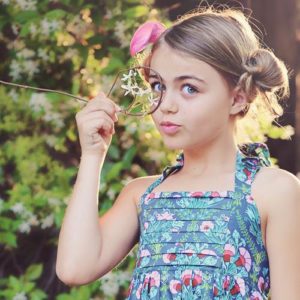
Sometimes Photoshop adjustment layers and Photoshop actions can make a huge difference in taking images from good to great. In a recent Photoshop online training class, I was working with Heather of HGJ Photography. Her straight out of camera image was really good. The lighting was pretty and the composition pleasing. I decided to show her how a few clicks in Photoshop could liven up the image – especially using some selective editing.
Here are the steps we took:
- To enrich the color of the grass, I started by pulling up a Hue/Saturation adjustment layer. I dropped down and worked on the yellow and then the green channels. With the yellow channel selected, I changed my settings to: hue +26, saturation +24, lightness -21. Then on the green, I altered my settings to: hue +7, saturation +47, lightness stayed the same. I liked the color much better of the grass now, but this will be a personal preference, and will vary based on what you colors you have to start.
- Used the FREE Photoshop action, Touch of Light/Touch of Darkness, with a brush set to 30% opacity. I used the touch of light layer and lightened the chair and legs and arms of the girl. Her face was already bright. Then I used the touch of dark layer and darkened and deepened the background.
- To add a more intense color on the chair and the grass, I used the Quickie Collection’s Selective Color Pop Photoshop action called Finger Paint Medium.
- The color was a bit off so I ran the Color Correction Photoshop action, Magic See-Saw, from the Bag of Tricks. I added warmth by using the yellow up and magenta up layers.
- I noticed bruises on the little girl’s legs and also deep lines under her eyes. I selected the background layer, made a duplicate copy, and used the patch tools to remove them. I brought the layer opacity to 72% so that the changes would look natural.
- Lastly I used the Eye Doctor – eye pop Photoshop action – and just activated the sharp as a tack layer to selectively sharpen the eyes. This way the rest of the image remained softer and dreamier.
No Comments
Leave a Comment
You must be logged in to post a comment.







Nice post! Like you’ve said, her SOC photo was already really nice but just a few little touches in PS really made it pop!
Thanks – this was great to read! 🙂
Thanks for all your help again Jodi! For anyone reading this who hasn’t taken a class from her yet–I would highly recommend it. I have learned so much:)
NOw Iam a very amateur with these things – never tried an action in my life. But I actually like the original (maybe its my screen to, I’ve never calibrated it either). I’m finding her skin a bit washed out in the after shot, and her white top is nearly lost against her arm. I do like the colour pop of the clothes and chair; the grass and trees I would need to know the reality of their colour first. Just my opinion, and again I am very new to all of this.