Featured Products
-
Sale!
-
Sale!
-
Sale!
-
Sale!
-
Sale!
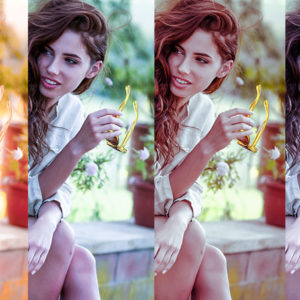

There are many times when you shoot photographs in the studio and wish you could be on location, in a city, in the woods, anywhere but in your studio. Here is a tutorial to make a normal studio shot into the on location shot that you wished you were able to take.

Step 1 – Original Image
Here is the starting image. An unedited studio shot.
Open the image in Lightroom. And first we are going to use the Spot Removal tool to clean up some blemishes.

2 – Spot Removal Tool
Once the image is cleaned up, let’s apply a quick Lightroom preset. Flux Bundle: Commercial: Clean up will give just the right amount of refinement so we can work with it easier in Photoshop.

3 – Apply Lightroom Preset
Export the image as a JPEG to the Hard Disk. Make sure the quality is 100% and it is not set to Resize to Fit.

4 – Export
After Lightroom the image is ready for Photoshop

5 – After Lightroom
Open the image in Photoshop and duplicate the layer and hide the background layer. This is good incase you make a mistake and accidentally save.
Use the Magic Wand tool to select out the background. Holding SHIFT will allow you to keep selecting more of the background of the image. Use the Lasso tool to clean up the leftover areas that didn’t get selected using SHIFT before drawing your lassos.

6 – Magic Wand
Once you have the background all selected out, Inverse the selection.

7 – Inverse Selection
Apply a layer mask.

8 – Mask
Save this file as a PSD.
Now let’s open our new background image. I went on Shutterstock and found a nice nighttime cityscape.

9 – Background Image
Now place the saved PSD file of our model on the new background. You can do this by either dragging and dropping the PSD on the file or using the Place option in the File menu.

10 – Overlay Image
Doesn’t quite look right yet but it is better to place the model on the background before editing the new background image.
Select the background layer.
Using Blur Gallery in the filter menu, select Field Blur. 30px blue with a 41% Light Bokem and 41% Bokem Color will give the background a nice out of focus look to shot depth.

11 – Blur 1
Now, select the Iris Blur and place the circle over top of the models head. 6px blur. This will allow a center of focus on the models face while adding a slightly gradiated blur around the rest of the image.

12 – Blur 2
The image still looks cut and pasted together. So we are going to blend the colors of the image together using the Color Lookup adjustment layer. I applied a Lightness Decrease and made it a clipping mask of the model layer so only she was darkened to match our dark background.

13–Color-Lookup
We are going to soften the edges of the model layer as well so it doesn’t look so cut out. To do this, double click the layer mask on the layer and edit the mask in the Select and Mask feature that comes up. Here we can refine the edge of the mask to make it more natural looking.
I did a Smart Radius of 8px to blend the edges, upped the Smoothing to 5 to soften sharp corners, and applied a 2.0px Feather to apply a slight fade around our model.

14 – Edit Mask
Our image is looking better. Adding an additional light source will help blend our layer a bit more. So add a Gradient adjustment layer. When the window opens, edit the gradient by double clicking on it. Set the color on the left to a light baby blue. Set the color on the right to white and set the opacity of the white to 0 (zero) so the gradient will be a smooth fade to clear. Then in the layers palette, set the blending option to Soft Light.

15 – Gradient Light
Save this as a PSD and then save as a JPEG so we can put it back into Lightroom to finish it off.

16 – After Photoshop
Once back in Lightroom we are going to apply another quick click filter. Flux Bundle: Set the Tone: STT-008 – Autumn Mute. This washes out the blues a bit and creates a warmer, more balanced image.

17 – Apply Lightroom Preset
Export your image as a JPG to the Hard Drive, just like we did earlier.

18 – Finished Image
As you can see, our plain out studio shot is now an on location shot that brings a whole new life to it.


Recent Posts


