Featured Products
Before you save your images for print or load them to the web, are you sharpening them? What if we told you that with some quick and easy steps, you could increase the quality of your images for print or web use?
It’s true! See how.
Why is This so Important?
Sharpening will create more contrast and separate the color in your image. Have you ever just sat staring at your screen thinking, “This image just looks so flat and it’s kind of gross.” Well, if you sharpen it, edges within your image will be more pronounced and will bring it back to life. The difference is amazing!
Oh, and if you are thinking, “But I have a super awesome and expensive camera and I only carry the best lenses in my very stylish camera bag. I don’t need to sharpen anything.” Oh, honey … yes you do.
The more contrast you have between the colors in your images (black and white being the highest contrast) the more reason you need to sharpen your images. When you sharpen an image, you will increase the contrast between those color differences.
How Do I Sharpen an Image?
If you use the sharpen filters, you can end up with pixilated or ragged edges. So in order to have more control over the edge refinement and retain the quality of the image, you’ll want to use the Unsharp Mask.
In Photoshop, go to Filter > Sharpen > Unsharp Mask. You’ll see three sliders: Amount, Radius, and Threshold.
The Amount slider is really just increasing your contrast by making your dark pixels even darker and lightening the light pixels. As you move the amount up, your image will become grainy, so you’ll want to find a good balance. The Radius affects the pixels on the edge of the contrasting colors. The more you move the slider up, the larger the radius (and the more pixels you’ll change). The Threshold controls the amount of contrast. As you move the slider up, the areas where you have more contrast will be sharpened even more. If the threshold levels are left at a lower level, the low contrast areas (like skin) will look grainy.
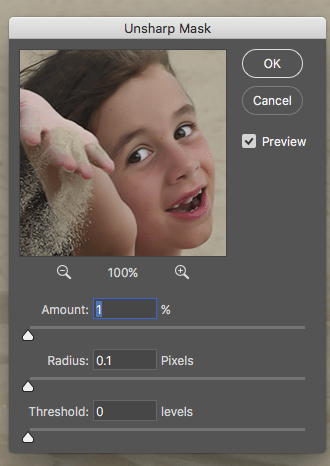
Set the radius first and keep the percentage on the low end (under 3%). Then adjust the Amount, without making your image grainy. Then adjust the Threshold to smooth out the low contrast areas (like skin).
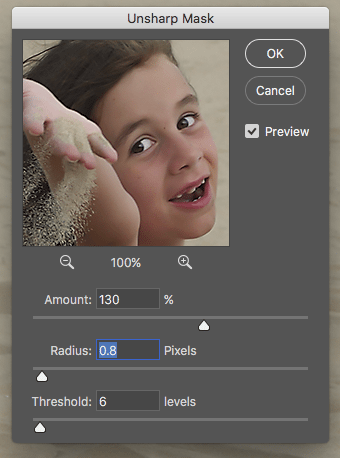
Web images do need more sharpening than print images — typically about three times more. If you are saving your image to the web, you’ll also want to change your pixels per inch from 300 (print resolution) to 72 (web resolution). In order to save time when sharpening web images and resize them, you can use an MCP Action that is part of the Fusion set. You can see how well it works in the “after” image below.

Before Sharpening

After Sharpening

